
California Cherry Yum Yum with Meyer Lemon
Ingredients
Method
- Preheat the oven to 350°F.
- In a food processor or by hand, combine the graham cracker crumbs with the melted butter until the mixture looks like wet sand.
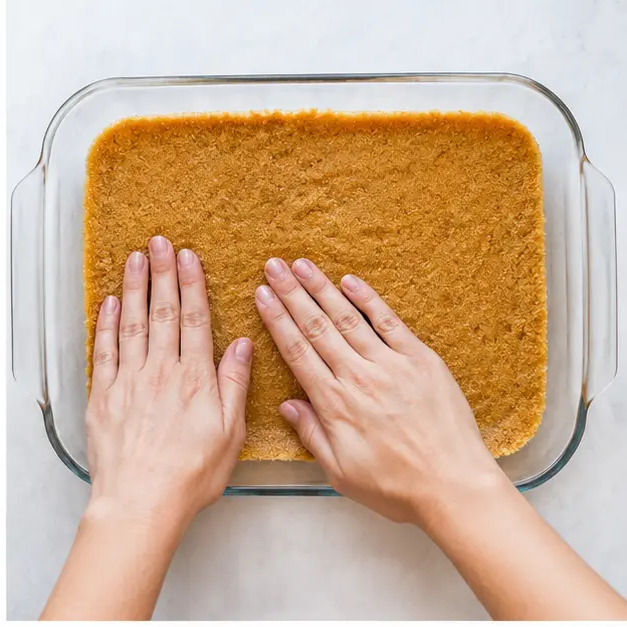
- Press the crumb mixture evenly into the bottom of a 9x13-inch baking dish. Bake for 10 minutes, then let cool completely. (You may skip baking and freeze the crust for 30 minutes instead.)
- In a large bowl, whisk together the sweetened condensed milk and Meyer lemon juice until thick and glossy.
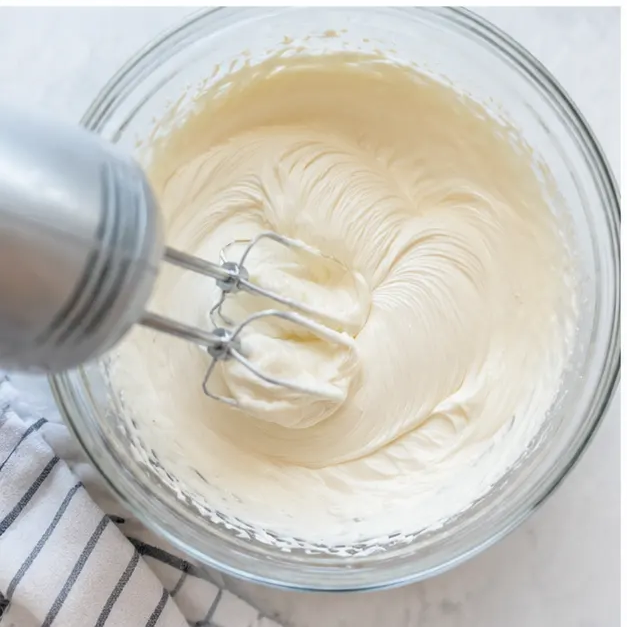
- Add the softened cream cheese and vanilla extract, and beat with an electric mixer until smooth and fully combined.
- Spread the cream cheese mixture evenly over the cooled crust, making sure it reaches the edges.
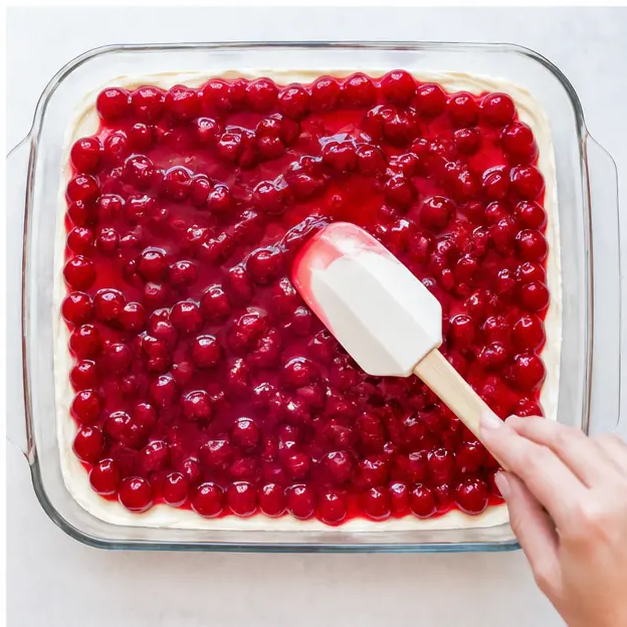
- Gently spoon the cherry pie filling on top and spread into an even layer, taking care not to disturb the cream cheese layer.
- Cover the dish with plastic wrap and refrigerate for at least 6 hours, preferably overnight, until set.
- Cut into squares and serve chilled. Store leftovers covered in the fridge for 3 to 4 days.
Nutrition
Notes
Tried this recipe?
Let us know how it was!Why You’ll Love This Cherry Yum Yum
It’s 90 degrees outside, you need a dessert for tomorrow’s potluck, and your oven is basically off-limits. I’ve been there. Honestly, the last thing you want to do is crank up the heat and stand over a hot stove. That’s where this cherry yum yum comes in. It’s a total lifesaver.
I first made this for a neighborhood barbecue, and I’m not kidding when I say it vanished in under ten minutes. People were hovering around the dish, scraping the edges for every last bit of that creamy layer and sweet cherry topping. It’s one of those desserts that looks way more impressive than the effort you put into it. And let me tell you, that’s my favorite kind of recipe.
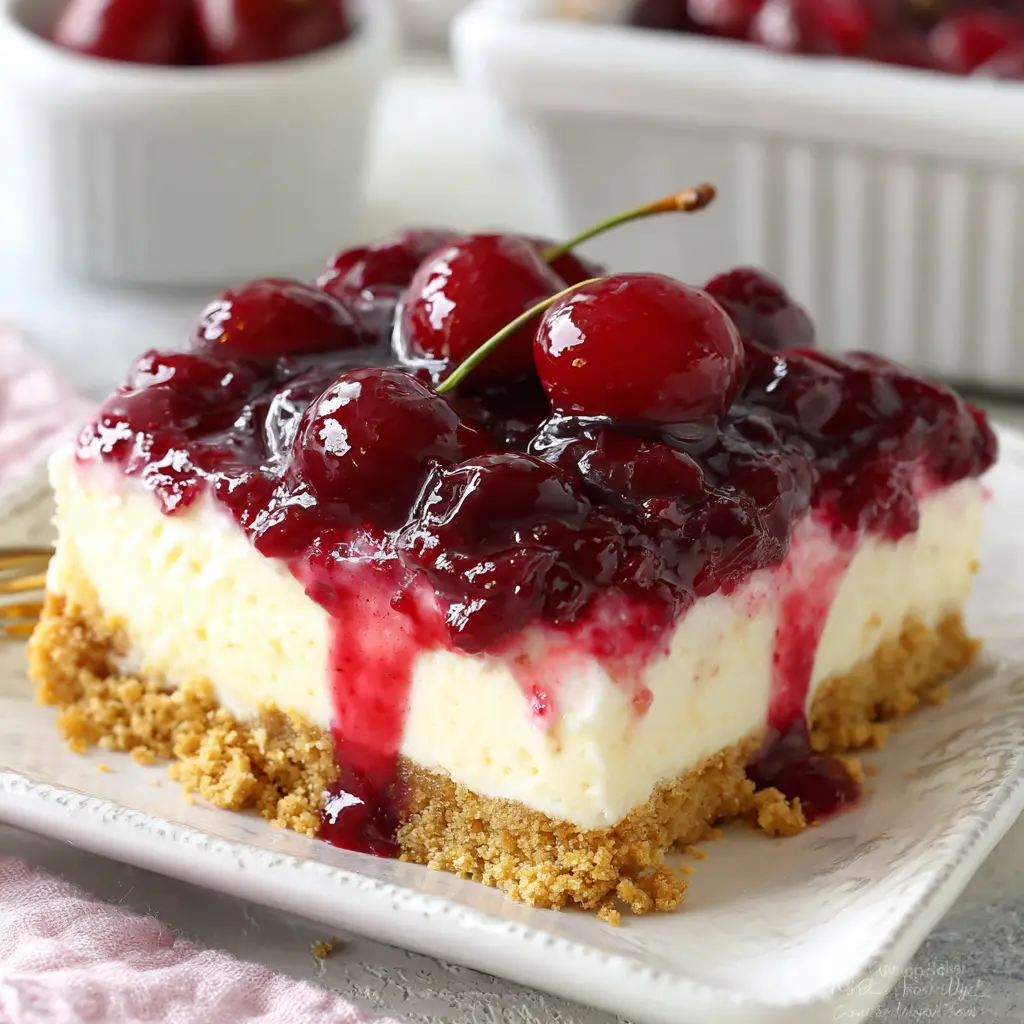
This cherry yum yum recipe is a no-bake layered dessert that’s basically a cross between a cheesecake and a pie. You’ve got a buttery graham cracker crust, a creamy Meyer lemon cheesecake filling, and a luscious cherry pie topping. It’s cold, it’s refreshing, and it’s the perfect summer dessert. Plus, it’s a make-ahead dessert, so you can prep it the night before and just chill out while it sets in the fridge. No stress, no mess, just pure yum.
What makes this the best cherry yum yum? It’s the combination of textures and flavors. The crunch from the crust, the smooth and tangy cream cheese layer, and the sweet, jammy cherries on top. It hits every note. And since it’s a no-bake cherry dessert, you don’t need any special skills or equipment. Just a bowl, a spoon, and a fridge.
Ingredients You’ll Need
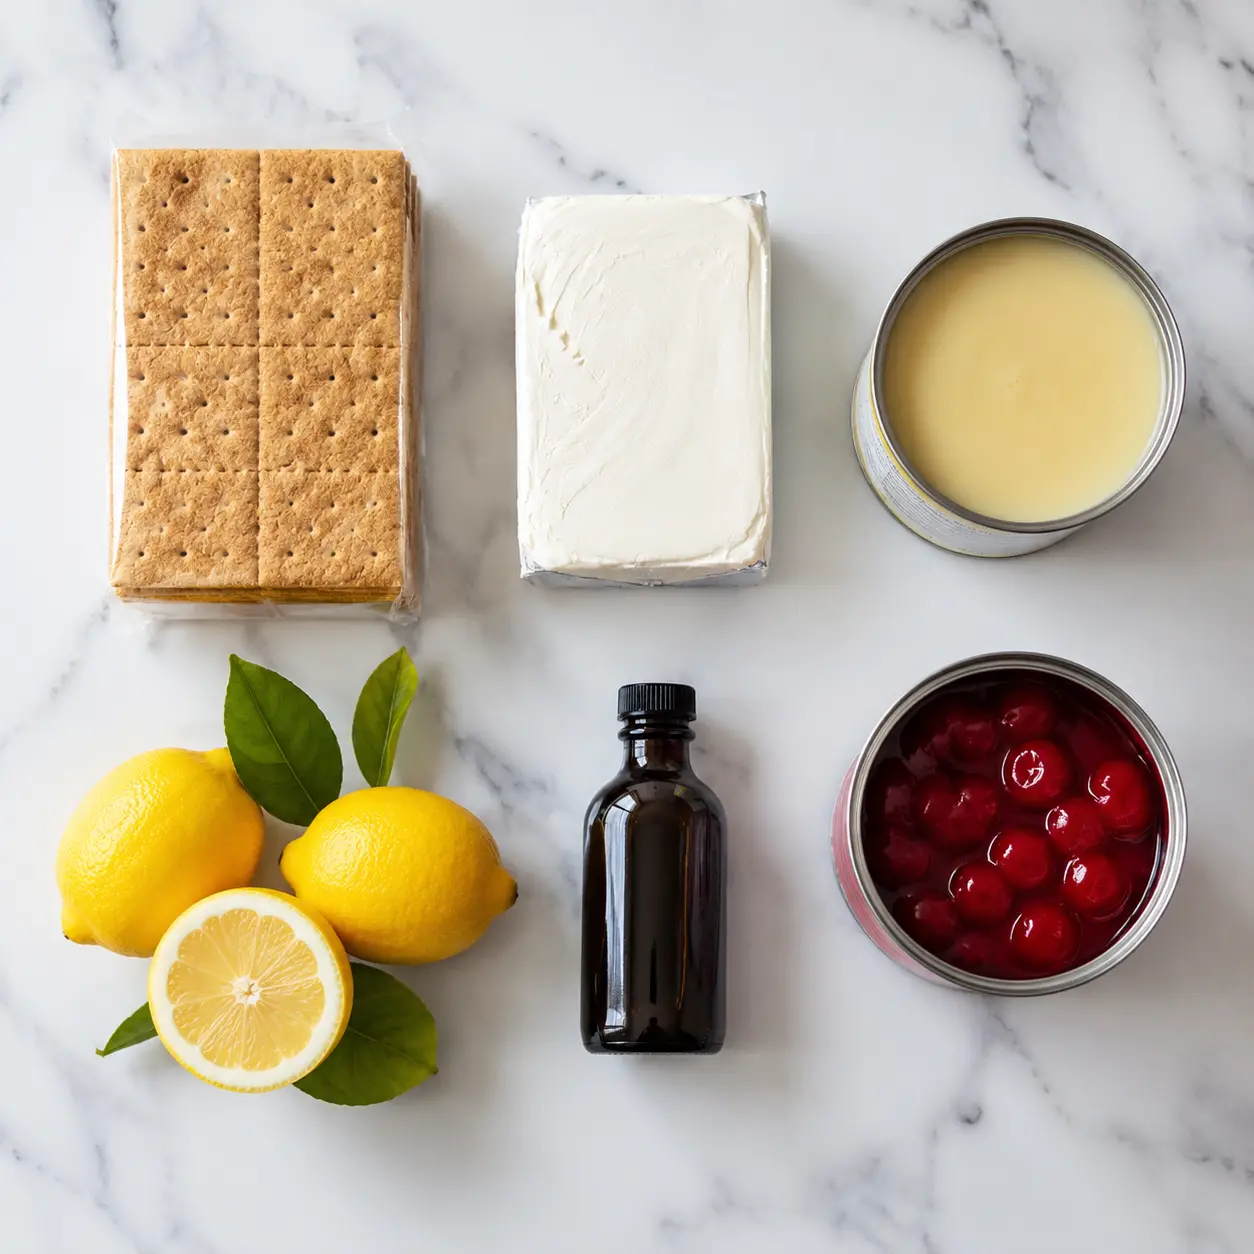
One of the best things about this cherry yum yum recipe is the short, simple ingredient list. You probably have most of these in your kitchen already. Let’s break it down.
For the Crust:
- Graham cracker crumbs: You’ll need about 1 1/2 cups, which is roughly 10-12 full crackers. You can crush them in a food processor or just put them in a zip-top bag and go at it with a rolling pin. Both work great.
- Unsalted butter: Melted, to bind the crumbs together. This gives the crust that classic buttery crunch.
For the Filling:
- Full-fat cream cheese: This is non-negotiable for the best texture. Two 8-ounce blocks, softened to room temperature. Don’t use low-fat here, or your filling might end up a bit runny.
- Sweetened condensed milk: One 14-ounce can. This adds sweetness and a luscious, creamy consistency.
- Fresh Meyer lemon juice: About 1/4 cup, from roughly 2 lemons. Meyer lemons are a bit sweeter and more floral than regular lemons, but regular lemons work perfectly fine too.
- Vanilla extract: Just a teaspoon for depth of flavor.
For the Topping:
- Cherry pie filling: One 21-ounce can. That’s it. You can use store-bought or homemade if you’re feeling ambitious. I usually grab a can of the premium stuff for more cherries.
See? Simple. This is truly an easy potluck dessert that anyone can pull off.
Step-by-Step Instructions
Okay, let’s get to the fun part. I’ll walk you through the four main stages of making this cherry yum yum. Don’t overthink it just spread and chill.
Stage 1: Prepare the Crust
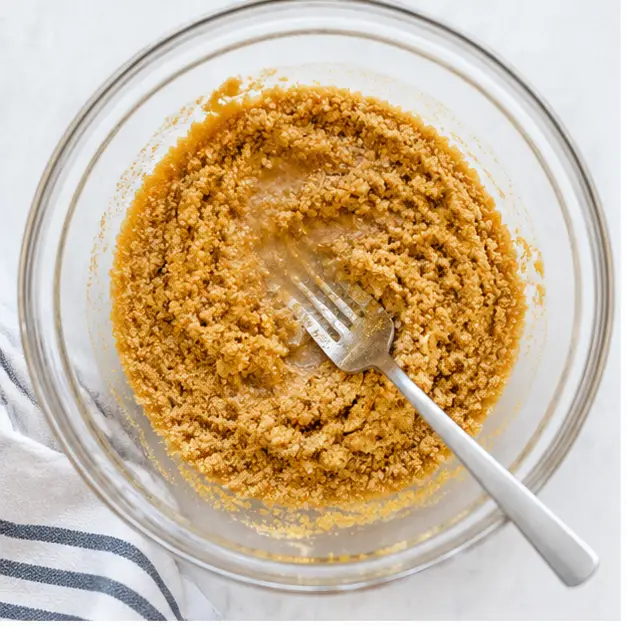
First, preheat your oven to 350°F. In a food processor or by hand, combine the graham cracker crumbs with the melted butter. You’re looking for a texture that resembles wet sand. Once it’s all mixed, press the crumb mixture evenly into the bottom of a 9×13-inch baking dish. I like using the bottom of a measuring cup to really pack it down. Bake for 10 minutes, then let it cool completely. If you really don’t want to use the oven (I get it, it’s hot), you can skip the baking and just freeze the crust for 30 minutes instead.
Stage 2: Make the Filling
While the crust is cooling, make the filling. In a large bowl, whisk together the sweetened condensed milk and Meyer lemon juice. You’ll see it start to thicken and become glossy almost immediately that’s the magic of the acid reacting with the milk. Then, add the softened cream cheese and vanilla extract. Beat everything with an electric mixer until it’s smooth and fully combined. No lumps allowed! Make sure your cream cheese is really soft, or you’ll end up with little white specks throughout.
Stage 3: Assemble the Layers
Now for the easy part. Spread the cream cheese mixture evenly over the cooled crust. Make sure it reaches all the edges. Then, gently spoon the cherry pie filling on top and spread it into an even layer. Be careful not to disturb the cream cheese layer underneath. Just let it sit on top like a beautiful, glossy blanket.
Stage 4: Chill and Serve
This is the hardest part: waiting. Cover the dish with plastic wrap and refrigerate for at least 6 hours, but overnight is really best. This gives the layers time to set and meld together. When you’re ready to serve, cut it into squares and serve it cold. Store any leftovers covered in the fridge for 3 to 4 days. Though honestly, leftovers are rare with this one.
Tips for the Best Cherry Yum Yum
I’ve made this cherry yum yum a dozen times, and I’ve picked up a few tricks along the way. Here are my best tips to make sure yours turns out perfect every single time.
- Let cream cheese come to room temperature. This is the number one tip. If it’s too cold, your filling will be lumpy. Leave it on the counter for about 30 minutes before you start.
- Use full-fat cream cheese. Low-fat or non-fat versions have a higher water content, which can make your filling runny. Stick with the full-fat stuff for that rich, creamy texture.
- Don’t overmix the filling. Once everything is smooth and combined, stop. Overmixing can incorporate too much air, which might cause the filling to crack as it sets.
- Chill it overnight. I know, I know, it’s hard to wait. But the longer it chills, the cleaner your slices will be. The flavors also have time to meld together, making it taste even better the next day.
- Buy premium cherry pie filling. If you can, grab the kind with more whole cherries and less goo. It makes a big difference in texture and flavor.
- For a firmer crust, bake it. If you’re short on time, you can freeze it instead. But baking gives it a nice, sturdy crunch that holds up better to the creamy filling.
Common Mistakes to Avoid
❌ Mistake: Overworking the whipped topping when folding.
✅ Solution: This recipe doesn’t use whipped topping, but if you’re making a variation with Cool Whip, fold it gently with a rubber spatula. Stop as soon as the white streaks disappear.
How to Serve Cherry Yum Yum
This cherry yum yum is a total showstopper at any gathering. It’s a classic potluck recipe for a reason. It travels well, serves a crowd, and everyone loves it.
Here are a few ways to serve it:
- Straight from the dish: For casual get-togethers, just cut it into squares and serve it right from the 9×13-inch pan. No fuss, no fancy plating.
- On individual plates: For a slightly more polished look, use a metal spatula to lift out neat squares. A dollop of fresh whipped cream on top is a nice touch.
- For potlucks: Make it the night before, keep it covered in the fridge, and bring it in the same dish you made it in. It’s that simple.
- For summer picnics: This is the perfect summer dessert because it stays cool and refreshing. Just make sure to keep it chilled until serving time.
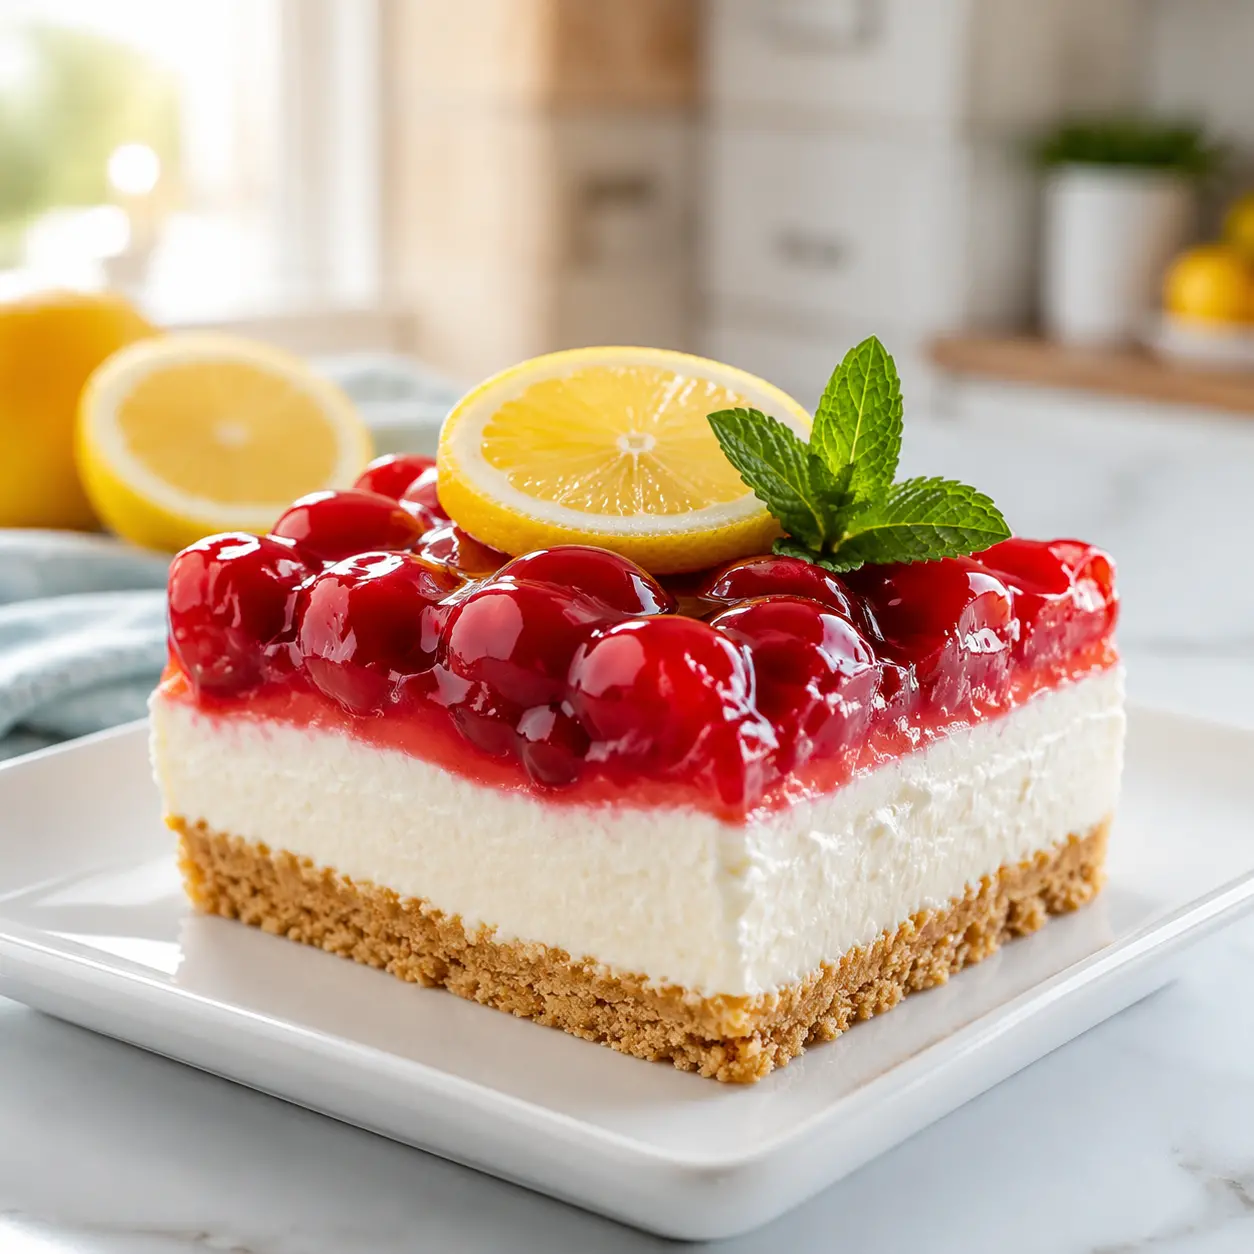
Honestly, you don’t need to do much to dress it up. The bright red cherries against the creamy white filling and golden crust are beautiful on their own.
How to Store Cherry Yum Yum
Storing this cherry yum yum is easy. Just cover the dish tightly with plastic wrap or transfer the leftovers to an airtight container. It will keep in the refrigerator for 3 to 4 days. In fact, it tastes even better the day after it’s made, as the flavors have more time to meld together.
Can you freeze cherry yum yum? Yes, you can! It freezes surprisingly well. Wrap the entire dish (or individual squares) tightly in plastic wrap, then a layer of foil. Freeze for up to 2 months. Thaw it overnight in the refrigerator before serving. The texture might be slightly softer, but it’s still delicious.
Recipe Variations
One of the best things about this cherry yum yum recipe is how easy it is to customize. Once you have the basic formula down, you can switch it up with different flavors. Here are a few ideas to get you started.
- Different fruit toppings: Instead of cherry pie filling, try blueberry, strawberry, or peach pie filling. Each one gives the dessert a completely different personality.
- Different crusts: Swap the graham crackers for crushed vanilla wafers, shortbread cookies, or even Oreos (just omit the cream filling). A gingersnap crust would also be amazing with the lemon filling.
- Add a layer of whipped cream: For an even lighter, fluffier dessert, fold a cup of thawed Cool Whip into the cream cheese mixture before spreading it over the crust. This is a common variation known as cherry lush.
- Make it a cherry delight: Some versions add a layer of chopped pecans or walnuts to the crust for extra crunch. You could also sprinkle some on top before serving.
The possibilities are endless. Don’t be afraid to experiment and make this no-bake cheesecake your own.
Frequently Asked Questions
Final Thoughts
So there you have it. My go-to cherry yum yum recipe for when you need a showstopper dessert without any of the oven-related suffering. It’s creamy, it’s fruity, it’s crunchy, and it’s everything you want in a summer dessert. Plus, it’s a make-ahead dessert, which means you can actually enjoy your own party instead of being stuck in the kitchen.
I really hope you give this one a try. Make it for your next get-together and watch it disappear. And if you do, I’d love to hear about it. You can find me on Pinterest sharing all my favorite no-bake recipes. Come follow along for more easy dessert inspiration!
Happy cooking, and stay cool out there!
What exactly is cherry yum yum?
Cherry yum yum is a no-bake layered dessert. It’s made with a sweetened graham cracker crust, a creamy cream cheese and condensed milk filling, and a cherry pie filling topping. Think of it as an easy, chilled cheesecake that you can make without turning on the oven.
How long is cherry yum yum good for?
Covered tightly in the refrigerator, cherry yum yum will stay fresh for about 3 to 4 days. It actually tastes even better the next day after the flavors have had time to meld together. Just make sure it’s well-wrapped so it doesn’t pick up any other fridge odors.
What is a yum yum made of?
In the context of this dessert, a yum yum is made of a graham cracker crust, a creamy layer of cream cheese and sweetened condensed milk, and a fruit topping like cherry pie filling. It’s a simple, no-bake treat that’s been a favorite at potlucks and family gatherings for decades.
Can cherry yum yum be frozen?
Yes, cherry yum yum freezes beautifully. Wrap the dish tightly in plastic wrap and then a layer of foil. It will keep for up to 2 months. Thaw it overnight in the refrigerator before serving. The texture will be slightly softer, but it’s still delicious and refreshing.