
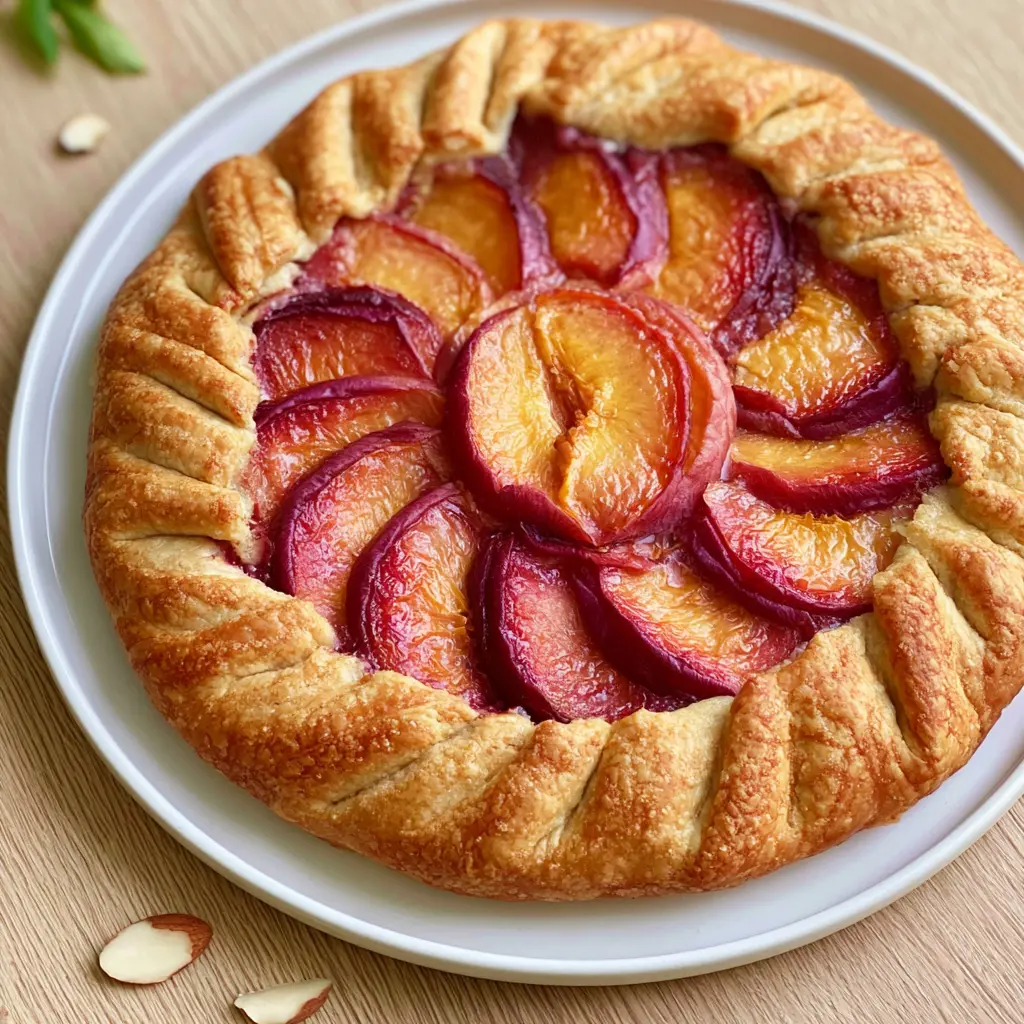
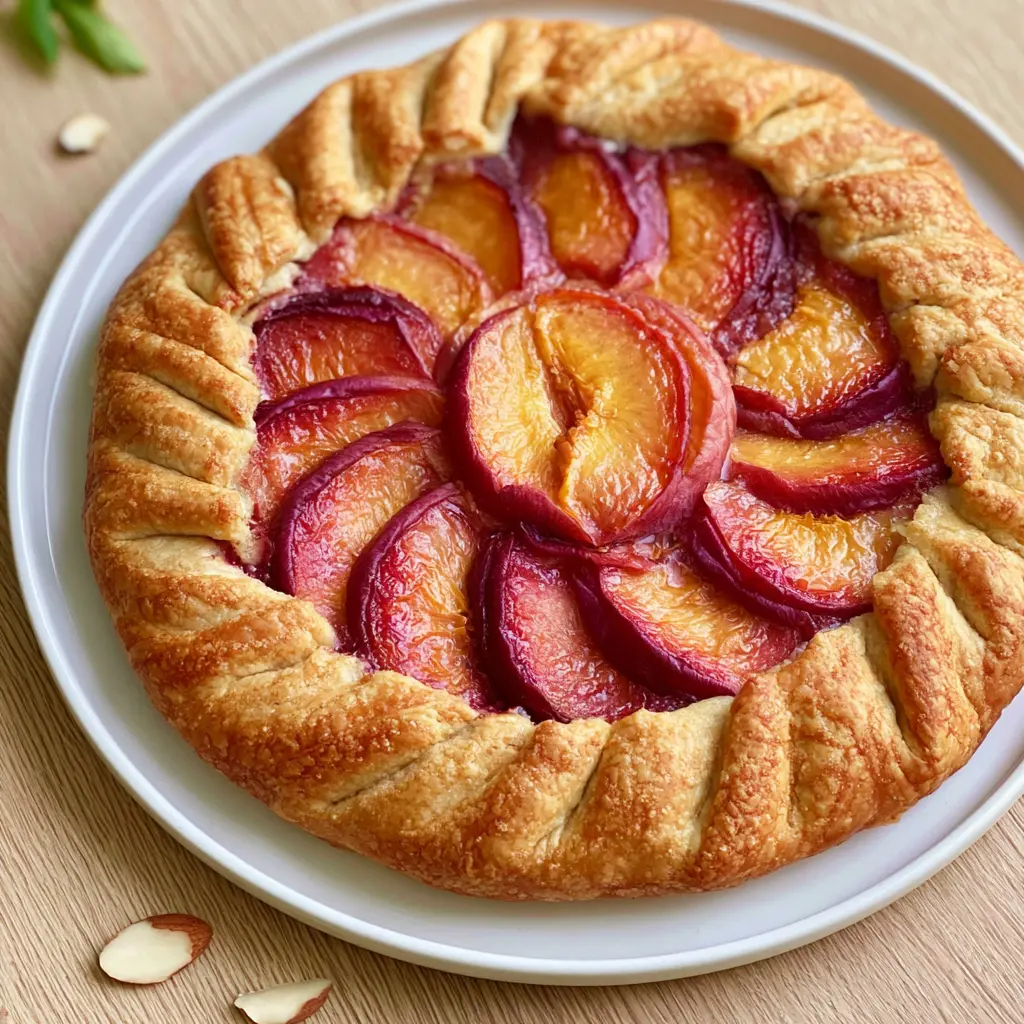
California Peach Galette with Almonds
Ingredients
Method
- In a food processor, pulse the flour, almond meal, and superfine sugar until combined.
- Add the cold butter cubes and pulse until the mixture looks like coarse crumbs with no large butter chunks remaining.
- Add the ice cold water a little at a time, pulsing between additions. Stop as soon as the dough begins to come together; it will still look shaggy.
- Turn the dough onto a lightly floured sheet of parchment paper and gather it into a ball. Place another sheet of parchment on top and roll it into a large thin circle.
- Refrigerate the rolled dough on a flat baking sheet for at least 1 hour, or up to 24 hours, until firm.
- Cut the peaches in half, remove the pits, and use a small serrated knife to cut them into thin slices. Put the slices in a mixing bowl.
- Add the lemon juice, superfine sugar, cornstarch, and half of the almond meal. Toss gently until the peach slices are evenly coated.
- Preheat the oven to 325 degrees F.
- Take the chilled dough out of the fridge and peel off the top sheet of parchment. Leave the dough on the bottom parchment and place it on a flat baking sheet.
- Sprinkle the remaining almond meal evenly over the dough.
- Arrange the peach slices in concentric circles or any pattern you like, leaving a 2-inch border of dough exposed around the edge.
- Fold the exposed dough border up and over the outer ring of peaches, pleating it as needed. Press gently to seal any cracks so the juices stay inside while baking.
- If using the egg wash, whisk the egg yolk with a teaspoon of water and brush it over the folded crust for a golden finish.
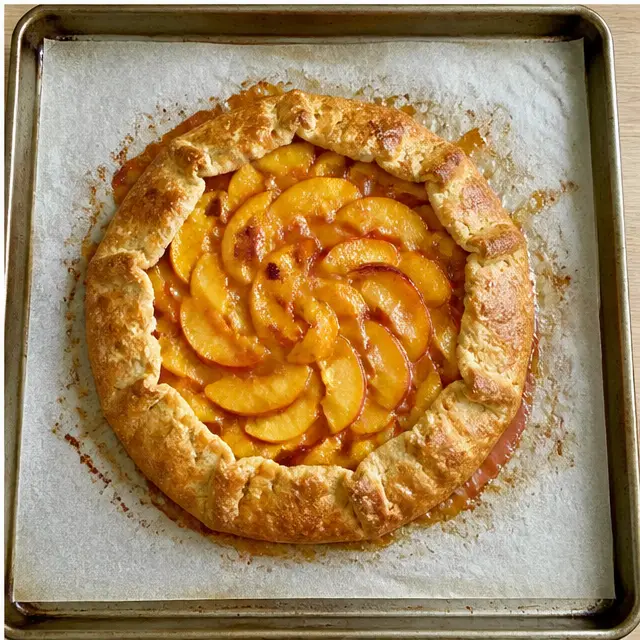
- Bake for 25 to 35 minutes, until the pastry edge is golden and the peaches are bubbling. Let cool until barely warm, then serve with vanilla ice cream if desired.
Nutrition
Notes
Tried this recipe?
Let us know how it was!Why You’ll Love This Peach Galette
It’s August. Your counter is overflowing with ripe summer peaches that all decided to ripen on the same day. You want something special for the weekend barbecue, but the thought of making a traditional pie, with all that crimping and lattice work, feels like too much. I’ve been there. This is where the lazy person’s pie comes in.
This peach galette is the free-form tart that thinks it’s a pie, but without the pressure of perfection. It’s a rustic peach galette that looks like it came from a bakery window, but it’s honestly one of the easiest desserts I know. There’s no pie pan to fuss with, no perfect edges to crimp, and no rolling pin gymnastics required to get a flawless circle. The messier it looks, the more charming it appears.
The secret here is a flaky, all-butter pie crust that gets a subtle nutty upgrade from almond meal. It cradles a jammy, juicy peach filling that’s brightened with fresh lemon juice. When it bakes, the whole kitchen smells like warm peaches and butter, and when you slice into it, the texture is pure summer. It’s the easy peach galette you’ll turn to all season.
This is the versatility you need:
- It comes together in about 15 minutes of active time
- No pie pan or special equipment required
- The dough can be made ahead of time
- It’s forgiving, even if you tear the dough (more on that later)
- Simple, minimal ingredients that are easy to find
This end-of-summer dessert is my go-to for using up those last farmers market peaches before the season fades. It’s the perfect way to celebrate the last official days of summer, whether you’re planning a Labor Day cookout or just want a casual weeknight treat.
Ingredients for Peach Galette
This recipe keeps things beautifully simple. The ingredient list is short, but every single item plays an important role in making the ideal peach galette. Let’s break down what you’ll need.
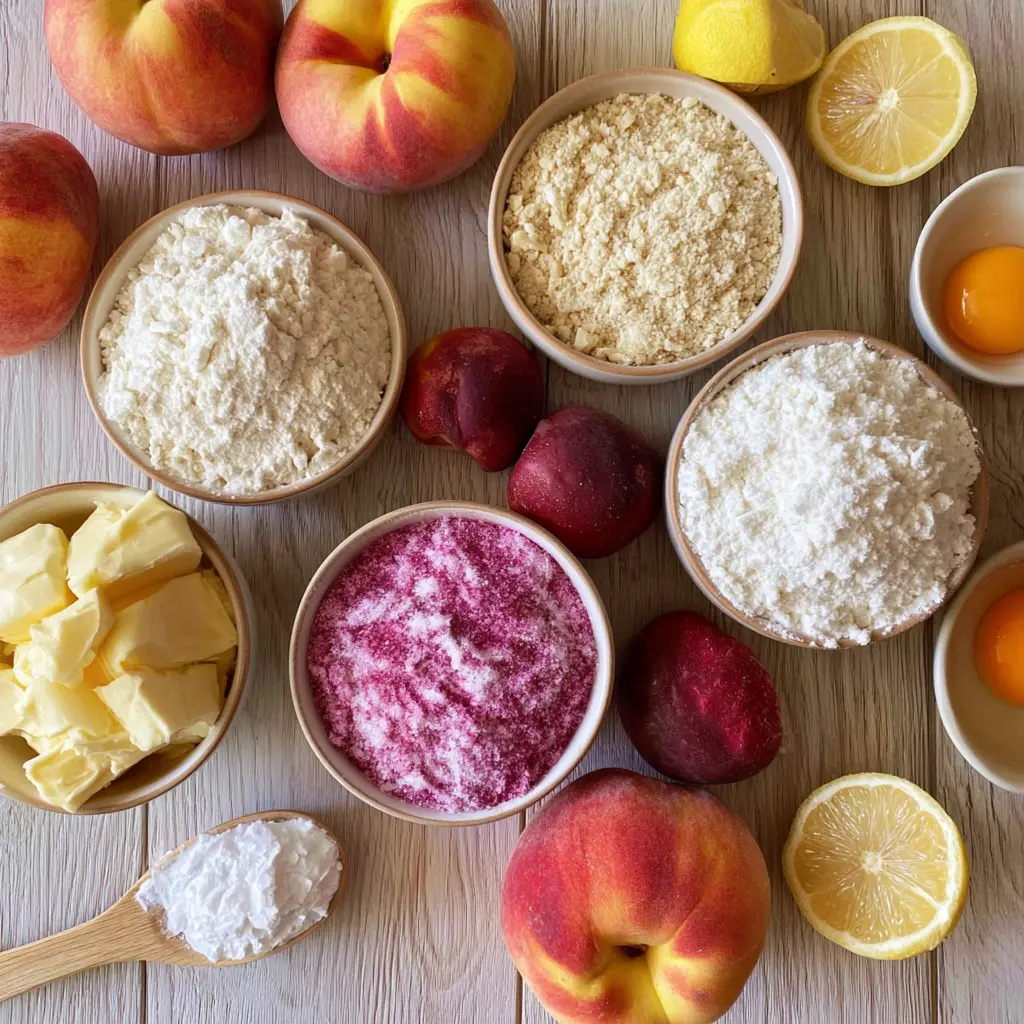
The star of the show is definitely the all-butter pastry. It uses a combination of all-purpose flour and finely ground almond meal, which adds a delicate, nutty flavor that pairs gorgeously with peaches. The cold unsalted butter creates those flaky layers we all crave, and a little superfine sugar gives it a gentle sweetness. You’ll also need ice cold water to bring the dough together.
For the peach filling, you’ll need about four large ripe peaches, which should weigh around two pounds total. The filling also uses a little more superfine sugar, a touch of cornstarch as a thickener, and fresh lemon juice to brighten everything up. Half of the almond meal goes into the filling, while the rest is used as a barrier on the pastry.
Let’s break down the key ingredients:
- Almond meal: This is the unsung hero. It’s in the pastry, in the filling, and sprinkled on the dough base to help prevent a soggy crust.
- Cornstarch thickener: This helps soak up the peach juices so the filling turns jammy instead of watery.
- Fresh lemon juice: A necessary acidic contrast to the sweet peaches. Meyer lemon is a California favorite if you have it.
- Superfine sugar: Dissolves faster than granulated, though you can absolutely use regular sugar in a pinch.
When it comes to shopping, I usually grab my groceries from Ralphs or Vons, and for the best peaches, I hit up the Santa Monica Farmers Market on a Wednesday morning. You can find everything you need at a standard supermarket like Whole Foods Market or Trader Joe’s, too. Just look for peaches that feel heavy for their size.
How to Choose the Best Peaches
Before you even think about turning on the oven, you need to talk about peaches. The success of your peach galette hinges on choosing the right fruit. I know, no pressure. But this is easier than you think.
You’re looking for peaches that are ripe but still firm. They should have a fragrant, peachy aroma when you hold them to your nose, and they should give slightly when you squeeze them, like a comfortable handshake. You want them to have that classic peachy smell that fills up your whole kitchen. Avoid peaches that are too soft, leaving finger indentations, or have any green background color, which is a sign they were picked too early.
A note on peeling: Should you peel the peaches? Here’s my decisive rule: Ripe freestone peaches can keep their skin. The skin adds a beautiful color and a little texture, and it helps the slices hold their shape during baking. If you’re using peaches with a fuzzy, thick skin, or if they’re slightly underripe, go ahead and peel them.
Freestone peaches are your best friend for this galette. Their flesh comes away from the pit easily, making slicing a breeze. Clingstone peaches, on the other hand, require a bit more work. You want slices that are roughly the same thickness so they cook evenly. And whatever you do, resist the urge to use white peaches. Their delicate flavor tends to get lost during baking.
One more tip: if your peaches are rock-hard, leave them on the counter in a paper bag for a day. They’ll ripen up right before your eyes. Just keep checking them, because overripe peaches will turn your galette into a watery mess, which brings us to the next point.
How to Make Galette Dough
The dough is the foundation of a great peach galette, and this galette dough recipe is my absolute favorite. It’s a flaky pastry dough that’s forgiving and easy to work with. If you’ve had a bad experience with pie dough in the past, I promise this is the one that will redeem you.
The key is to keep everything cold and work quickly. I like to use a food processor because it makes the process foolproof, but you can absolutely do this by hand. If you’re going the manual route, rub the cold butter into the dry ingredients with your fingertips or a pastry cutter until the mixture looks like coarse crumbs. The goal is to have visible little pieces of butter, as those are what create flaky layers during baking.
Once you add the ice cold water, stop as soon as the dough begins to come together. It will still look shaggy, and that’s exactly what you want. Overworking the dough will make the crust tough, so resist the urge to overmix. Here’s a little honesty moment: the first time I made this, I overworked the dough, and the crust came out more like a cracker. It was still delicious, but not nearly as tender.
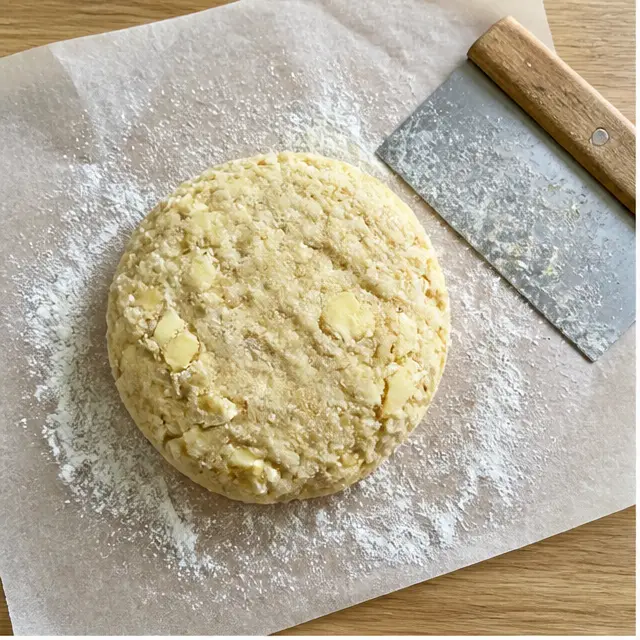
Turn the shaggy dough onto a lightly floured sheet of parchment paper, gather it into a ball, and place another sheet on top. Roll it into a large, thin circle. You don’t need it to be perfect, just roughly even. A thinner, larger round is great because it maximizes the surface area for the peaches to sit on.
Here’s my favorite step: refrigerate the rolled dough on a flat baking sheet for at least 1 hour, or up to 24 hours. This step is non-negotiable. Chilling the dough before baking reduces shrinkage and keeps the butter cold, which is what gives you those beautiful flaky layers. If you have the time, letting it chill overnight makes the dough even easier to handle.
Make-ahead tip: The dough can be made a day ahead and kept covered in the fridge. It also freezes beautifully for up to 3 months. Just thaw it in the fridge overnight before you’re ready to use it. If you’re short on time or just not feeling ambitious, a good quality store-bought pie dough is a perfectly acceptable shortcut.
How to Make a Peach Galette
Now for the fun part, assembling your rustic peach galette. Once you have your dough chilled and your peaches sliced, this comes together in minutes. This is the part where you can let your inner artist out, because the folding is forgiving and the look is meant to be rustic.
Start by preheating your oven to 325 degrees F. Yes, 325, which is lower than some recipes. This gentle heat allows the peaches to soften and release their juices without burning the crust before the filling is cooked through. While the oven heats up, take your chilled dough out of the fridge and peel off the top sheet of parchment.
Leave the dough on the bottom parchment paper and transfer it to a flat baking sheet. Now, sprinkle the remaining almond meal evenly over the center of the dough. This is your secret weapon. This almond meal barrier is the key to preventing a soggy crust. It acts like a sponge and a shield, absorbing the moisture from the peaches and keeping the pastry crisp.
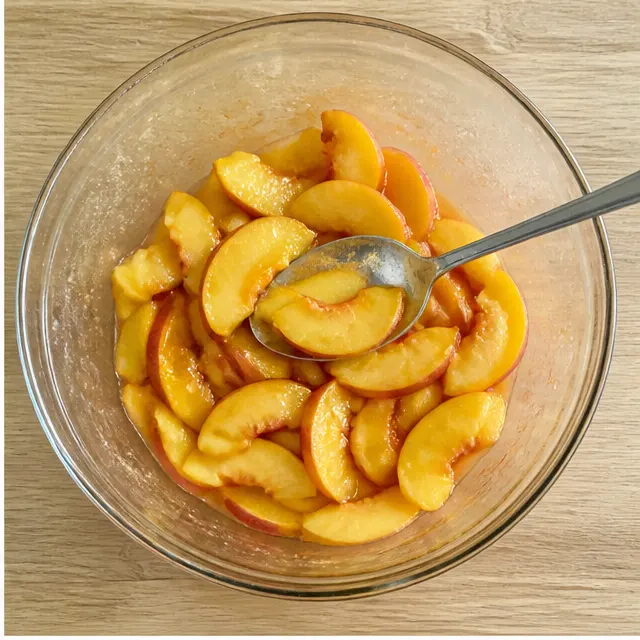
Now for the filling. In a mixing bowl, you’ll have already tossed your peach slices with the lemon juice, sugar, cornstarch, and half of the almond meal. Give it one more gentle toss, then arrange the peaches in concentric circles over the dough. You can be as precise or as carefree as you like. Leave a 2-inch border of dough exposed around the edge, as that’s what you’ll fold over.
Fold the exposed dough border up and over the outer ring of peaches, pleating it as you go. This creates that iconic free-form tart look. Press gently to seal any cracks so the juices stay inside while baking. I always get tiny tears in my dough at this stage. Don’t stress. Just patch them with a little scrap of dough, like a quilt. The finished galette will still bake up beautifully, and those imperfections are part of the charm.
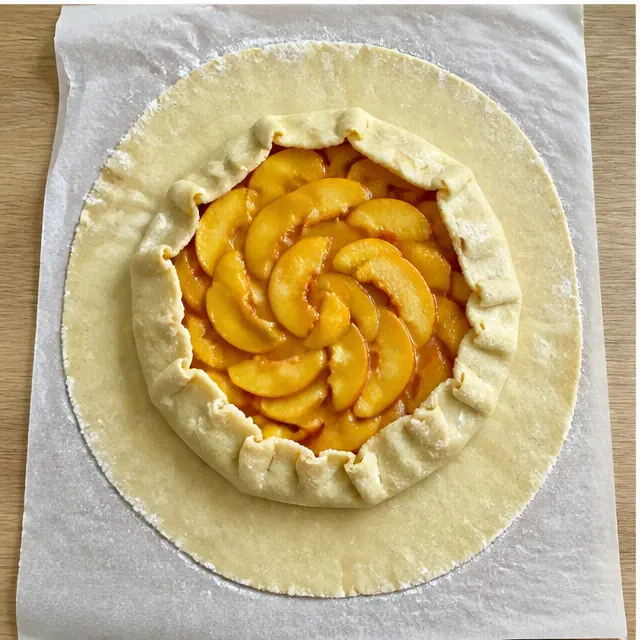
Here’s a crucial detail: if you’re using the egg wash, whisk the egg yolk with a teaspoon of water and brush it only over the folded crust. If you let it drip down onto the peaches, it can look streaky after baking. Trust me, I’ve made that mistake. The egg wash is what gives the pastry that beautiful golden finish.
Bake for 25 to 35 minutes, until the pastry edge is a deep golden brown and you can see the peach juices bubbling up at the seams. The smell at this point is absolutely incredible. It’s warm, fruity, buttery, and feels like the very essence of a late-summer afternoon. Let the galette cool until barely warm before slicing, so the juices can settle a bit.
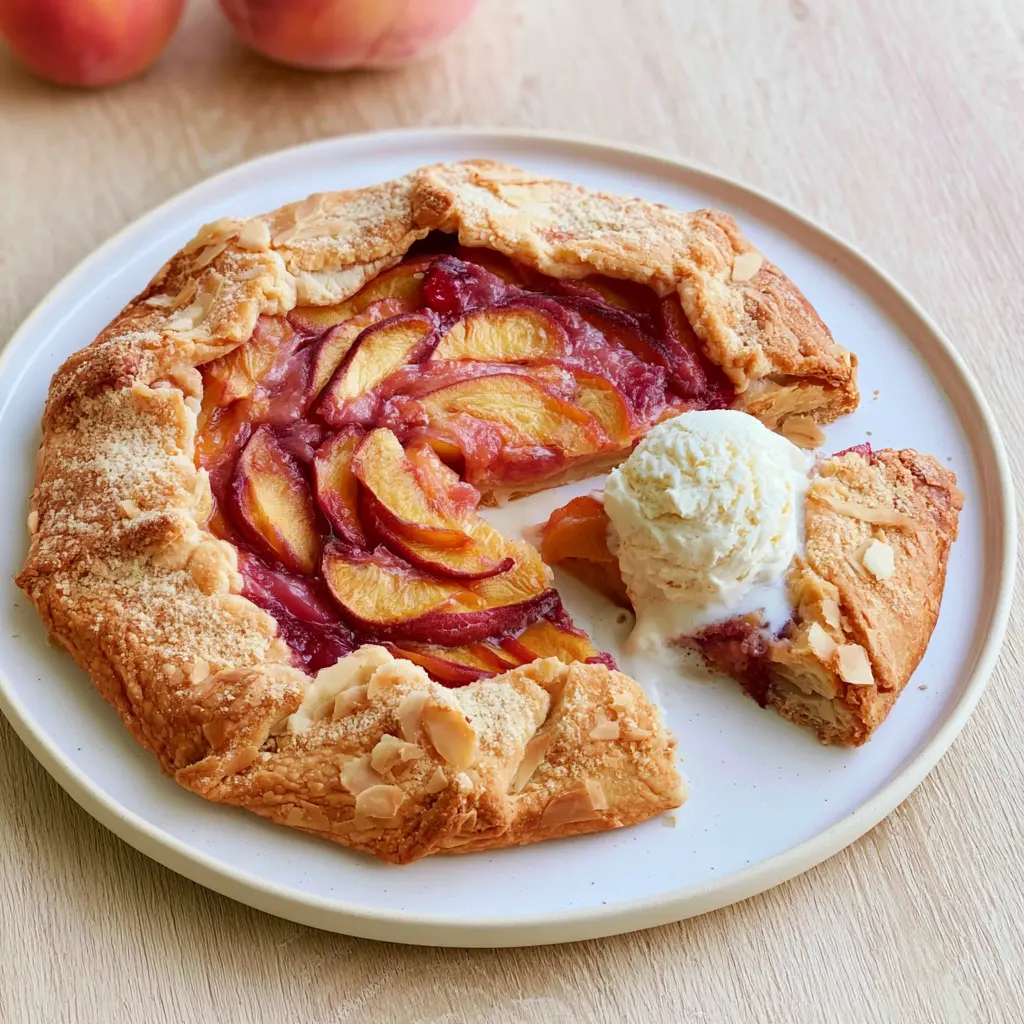
This is the payoff moment: a warm slice, the amber peach juices still bubbling, a cold scoop of vanilla ice cream melting right into it. The contrast of temperatures, the crunch of the crust against the melting ice cream, it’s summer captured in one bite.
Peach Galette Variations
Once you’ve mastered this recipe, which I know you will, the possibilities are endless. The beauty of this galette is that the method works with so many other fruits. It’s the gift that keeps on giving.
When peaches are out of season, or when you want to change things up, the swaps are simple and forgiving. You can use a one-to-one swap for most stone fruits, meaning the same amount of fruit, just a different kind.
Try these delicious variations:
- Nectarines: These are the easiest swap. No peeling hassles, and they bake up just like peaches.
- Plums: Their tarter flavor is a lovely contrast, and they hold their shape well when cooked.
- Apricots: Smaller and sweeter, and they make a gorgeous, jewel-toned filling.
- Berries: Add a handful of blueberries or blackberries to the peach filling for a more complex, juicy fruit galette.
- Spices: A pinch of warm spices like cinnamon or nutmeg can deepen the flavor profile.
Another fun adjustment: swap out some of the superfine sugar for brown sugar, which will bring a caramel note to the fruit. You can also brush the finished galette with a little warmed apricot jam for extra shine, if you’re feeling fancy. The tart is also delicious when served with a dollop of lightly sweetened whipped cream.
If you’re avoiding gluten, you can try a gluten-free all-purpose flour blend in the dough. Just know the texture will be slightly different. And for a dairy-free version, use a high-quality vegan butter substitute, keeping it very cold.
How to Store and Reheat Leftovers
In my house, a peach galette rarely survives the night. But if you do happen to have leftovers, which is more likely if you make it for a crowd, here’s how to keep it tasting its best.
The most important thing to remember is this: don’t store it in the fridge until it’s completely cooled. And if you keep it for more than a day, the refrigerator is your friend, but you’ll need to bring it back to life in the oven to recapture that crispy crust.
Storage and reheating tips:
- Storage: The galette is best the day it’s baked. Store leftovers in the fridge, loosely covered, for up to 2 days.
- Reheating: The best way to revive it is in a 325 degrees F oven, just until it’s warm. This will help re-crisp the pastry.
- Avoid the microwave: Microwaving makes the crust soggy. Please, just don’t do it.
For the first day, you can skip the fridge and keep it covered at room temperature. But after that, it needs to go in the refrigerator to keep the peaches from spoiling. When you’re ready for round two, and you absolutely will be, a gentle reheat in the oven does magic. The texture comes back remarkably well, and with a fresh scoop of ice cream on top, you’d never know it was leftover.
Peach Galette FAQ
When your kitchen smells like warm peaches and butter, you’ll wonder why you ever feared pie. This easy peach galette is forgiving, absolutely delicious, and so simple to make. It will be your new go-to summer dessert, helping you use up a basket of ripe peaches in the most gorgeous way possible. I can’t wait for you to make it. If you do, I’d love to see your handiwork, be sure to share your baking with me on Pinterest.
Source: Learn More About This Dish
Why is my galette soggy?
The most common culprit is excess moisture from the peaches. This is where the almond meal barrier on the pastry helps. During baking, the almond meal soaks up the juices before they seep into the crust. Using a cornstarch thickener in the filling also helps, as does baking at 325 degrees F until the juices are fully bubbling.
How do I keep a galette from getting soggy?
The two-step method in this recipe works best. First, sprinkle almond meal over the rolled-out dough before adding the peaches. This creates an absorbent barrier. Second, toss your peach slices with cornstarch. This thickens the juices from the inside out. A hot oven at 325 degrees F also helps evaporate excess liquid.
How to store a galette?
For the first day, you can keep the galette covered at room temperature. After that, store any leftovers in the refrigerator for up to 2 days. To re-crisp the crust, reheat it in a 325 degrees F oven for about 10 minutes, or until just warm. Avoid the microwave to keep the pastry from becoming soggy.