

Why You’ll Love This Salty Canadian Iced Latte
Seven dollars for a small iced latte? Babe, we are never doing that again.
I hit my breaking point last August in a café line that wrapped past the pastry case. The barista handed me a cup that was honestly fine. Just fine. And it cost seven bucks plus a tip screen that side-eyed me. That’s avocado toast money, and I was spending it on mediocre coffee. That afternoon I went home and started making this salty Canadian iced latte, and it ruined café coffee for me in the best way.
This isn’t your average homemade iced latte. It’s a maple syrup coffee drink with real butter and a pinch of flaky sea salt, all frothed into hot espresso until it becomes this thick, velvety foam that settles over cold milk like a golden cloud. It tastes like a pancake breakfast over ice. Sweet, buttery, and then that tiny savory salt kick at the end makes everything pop.
You’ve probably seen the video version of this salty Canadian iced latte on TikTok, because it went absolutely viral. And unlike a lot of viral coffee recipes, this one actually lives up to the hype. This salted maple iced latte has earned its place in my daily rotation, which is saying a lot coming from someone who got burned by dalgona.
Here’s the one sentence of food science you need: salt doesn’t make it salty, it makes the sweetness and the coffee taste MORE. That’s the whole secret. No chemistry lecture, I promise.
When it’s 95 degrees and your AC is wheezing, this is the drink that fixes everything. It takes 5 minutes, start to finish, and you don’t need an espresso machine. I’ll show you the workaround below.
Ingredients & Substitutions
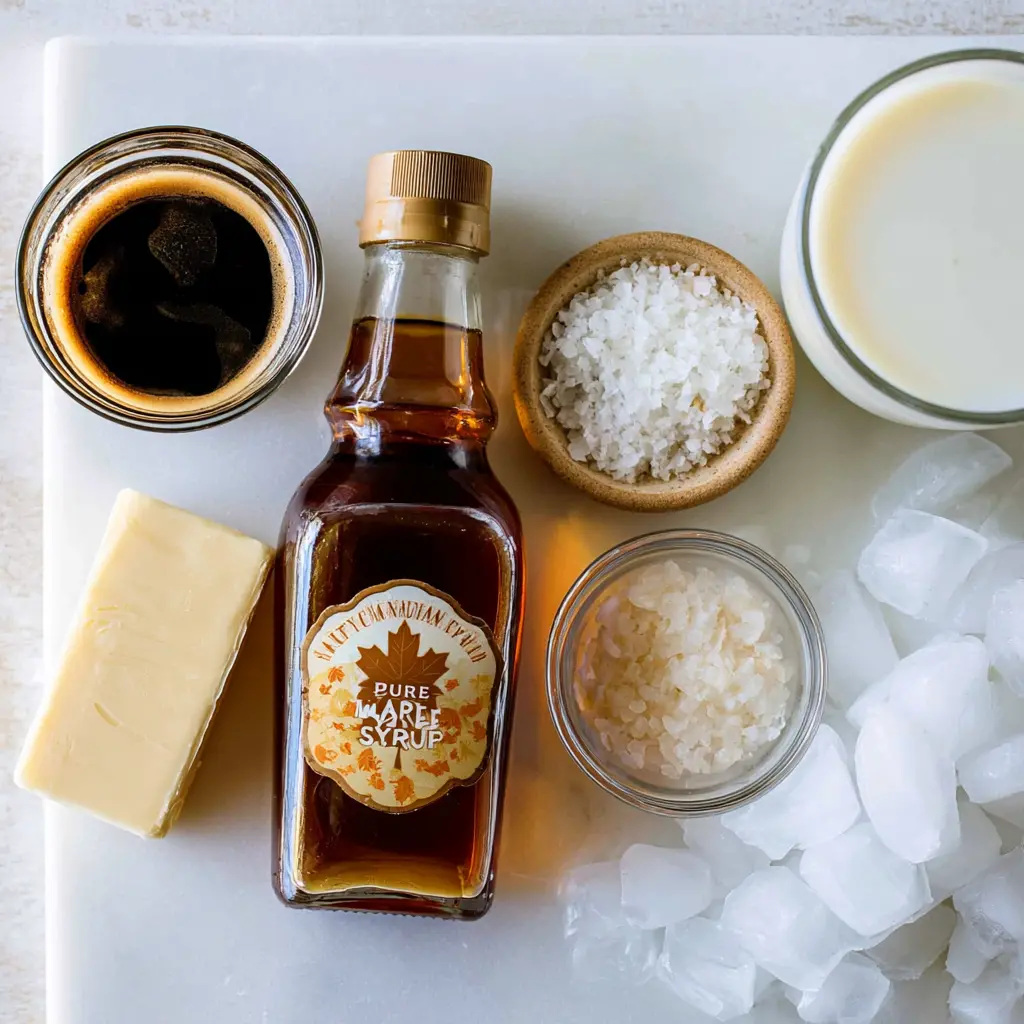
The ingredient list for a salty Canadian iced latte is short and forgiving, which is exactly why this iced latte with maple syrup has become my summer default. Here’s what each ingredient does, and how to swap it when you need to:
- Espresso: A freshly pulled double shot is ideal. No machine? Dissolve 1 to 2 teaspoons of instant espresso powder in 2 fluid ounces of hot water. Regular coffee won’t work here, it’s not concentrated enough to hold the foam.
- Pure maple syrup: This is the “Canadian” in the name. Use real Canadian maple syrup, not pancake syrup. Pure maple syrup vs pancake syrup isn’t even a contest: one tastes like the forest, the other tastes like artificial everything.
- Butter: Salted or unsalted, your call. This is the secret to the velvety foam that makes this drink feel like a café-quality drink at home.
- Flaky sea salt: The quiet star. It balances the maple and turns this into a proper sweet and salty coffee drink.
- Cold milk: Whole milk gives the richest, creamiest mouthfeel and the best foam. Barista-style oat milk or soy milk are fantastic dairy-free picks.
- Ice cubes: As many as your tall glass will hold.
First time I made this, I eyeballed the salt and my face fully puckered. The whole glass was a write-off. Use measuring spoons. Trust me.
Maple syrup grade matters a little. The darker grades bring a deeper, almost woodsy sweetness that stands up to the coffee and salt. Grab a bottle on your next Trader Joe’s run or Costco trip, just make sure the label says “pure maple syrup,” not “pancake” or “table” syrup.
How to Make a Salty Canadian Iced Latte
Let’s walk through the four stages of building this drink. The full measurements are in the recipe card below, but the why behind each step is what makes you actually good at it.
Stage 1: Build the Cold Base
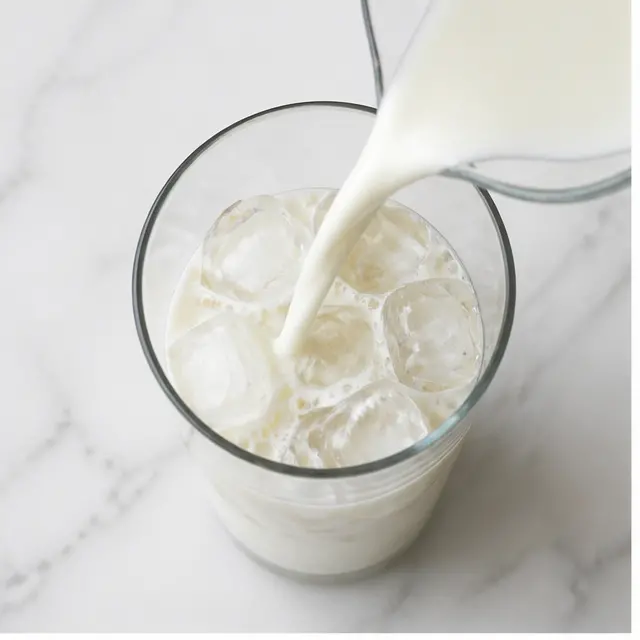
Fill a tall glass with ice cubes and pour the cold milk right over them. That’s the whole stage. The milk chills the glass and creates the pale canvas that the frothed coffee will float on. If you want that gorgeous layered iced latte look for your photos, this is where it starts.
Stage 2: Combine the Maple-Butter Espresso Base
In a measuring cup or small pitcher, combine the hot espresso, maple syrup, butter, and that precious pinch of flaky sea salt. The heat from the espresso is doing important work here: melting the butter and dissolving the syrup into one glossy, cohesive mixture. The moment the butter hits that dark espresso, the smell alone is worth it.
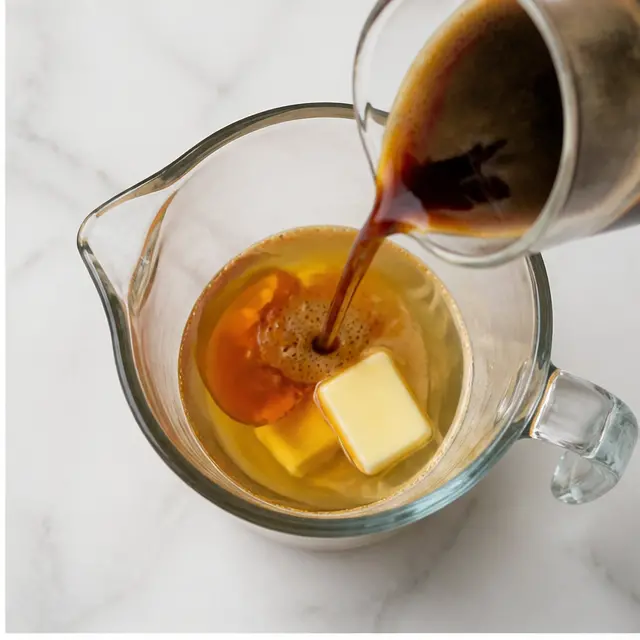
Timing is everything. You want that espresso hot when you froth, because the heat emulsifies the butter into the coffee. I learned this the hard way when I let the base sit for a minute to answer a text, and the foam never formed properly. Froth immediately, friends.
Stage 3: Froth Until Velvety
Grab a handheld frother or immersion blender and blend the hot espresso mixture until the butter is fully melted and a thick, velvety foam forms. Watch the dark liquid transform into a golden, almost butterscotch-colored cloud. It’s genuinely satisfying, every single time. The texture shift is wild, you’ll see it happen in seconds.
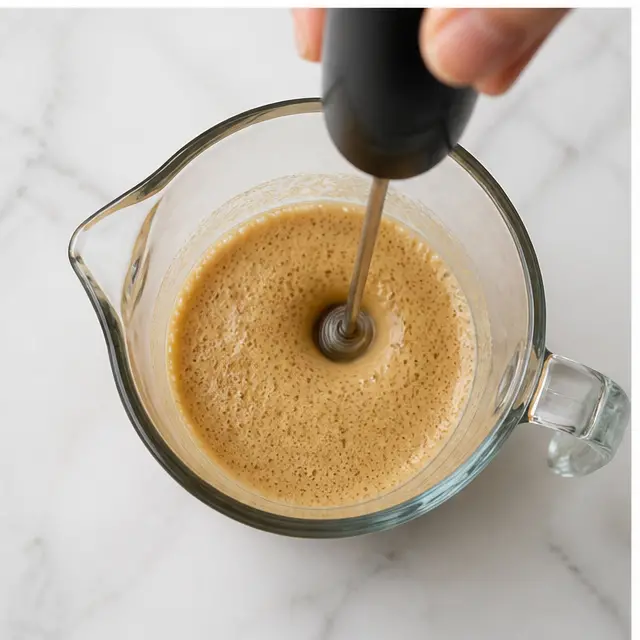
The butter is what gives this drink its body. It’s not a blob of butter floating on top of your latte, it’s a proper emulsion, and the foam is the payoff. A cold foam machine levels it up too, but honestly, a cheap handheld frother does the job perfectly.
Stage 4: Assemble and Serve Immediately
Slowly pour the frothed coffee over the milk and ice. Watch it float on top like a golden cloud meeting a snowbank. Stir gently if you want to blend everything, or leave it layered for the photo and stir before you sip. Either way, serve right away.

This is not a make-ahead-and-forget drink. The foam will begin to settle as soon as it hits the ice, and melting ice will slowly dilute the whole thing. So snap your photo, then drink it. That first sip, cold milk meeting that warm-ish golden foam with a crunch of salt, is worth every second.
Pro Tips for Serving & Foam
I’ve made this salty Canadian iced latte more times than I can count this summer, and these are the little lessons that took it from good to undeniable:
- Froth immediately after pouring the espresso. The heat is what emulsifies the butter. If it cools, the foam won’t form, and you’ll get a flat, separated drink.
- Whole milk wins for foam. It makes the richest, creamiest texture. Low-fat or plant milk will be lighter and less luxurious.
- Adjust the salt to your butter. Salted butter means you might want only a tiny pinch of flaky sea salt. Unsalted butter means the full pinch. Taste and adjust.
- Serve immediately. I keep repeating it because it’s the most important tip. The foam settles over time and the ice melts. This drink wants to be enjoyed right now.
- Make the base ahead. You can mix the espresso, maple syrup, butter, and salt base and refrigerate it for up to 2 days. Reheat it before frothing and it foams right back up.
❌ Mistake: Letting the drink sit before serving.
✅ Fix: Drink your salty Canadian iced latte right away, or the foam separates and the ice waters everything down.
❌ Mistake: Using spreadable dairy-free butter.
✅ Fix: Use stick-style dairy-free butter. Spreadable versions have too much water and won’t emulsify properly.
The couple of times I skipped the salt because I was rushing, the drink fell flat. That tiny savory zing on the finish is what separates this from just another sweet iced coffee. It’s the difference between good and unforgettable.
Dairy-Free & Other Variations
Dairy-Free Salty Canadian Iced Latte
Going dairy-free is easier than you’d think with this one. Swap in dairy-free butter sticks and use barista-style oat milk or soy milk for that creamy body. This dairy-free iced latte holds up beautifully, and my oat milk version is honestly my second favorite way to drink it. And I say that as a committed whole milk person.
The salt check matters here. Dairy-free butters vary wildly in salt content, so taste your base before frothing and adjust the flaky sea salt accordingly. You want the sweet-salty balance, not a salt lick.
Other Easy Swaps and Variations
- Cold brew concentrate: Out of espresso? Use 1/4 to 1/2 cup of cold brew concentrate. It’s strong enough to carry the butter and syrup, and it makes a killer maple cold brew on hot days.
- Batch it for a crowd: Make a double or triple batch of the espresso-maple-butter base ahead of time, refrigerate it, then reheat and froth portion by portion when friends show up for brunch. They’ll think you installed a barista station.
- Make it warm: This works beautifully as a hot latte too. Brew the espresso with maple and salt, heat your milk, pour it over, and finish with a tiny pinch of flaky sea salt. The butter just melts right in, no frother needed. It’s the cozy fall transition this drink deserves.
- Extra flaky salt on top: Sprinkle a few more flakes onto the foam right before serving. It looks stunning and gives you that salted caramel latte alternative energy at home.
This is also the perfect bridge drink: refreshing enough for the California heat right now, but maple-forward enough to carry you into sweater weather. One recipe, all seasons.

Make This Your Summer Signature Drink
Look, I get it. Viral coffee recipes have burned us before. The whipped dalgona was a fun afternoon, but it wasn’t a drink I wanted every single morning. This one is different. This salty Canadian iced latte is genuinely, stupidly good, and it costs pennies compared to the café version.
When you make this, you’ll never look at the café line the same. You’ll start timing yourself: five minutes from craving to first sip, in your own kitchen, in your pajamas. That’s the kind of luxury that actually pays you back. Every sip of that velvety, salty-sweet foam is a tiny victory over the seven-dollar latte industrial complex.
I’d love to see your version. Follow me on Pinterest for more summer coffee drinks and easy recipes, and save this one for your next grocery run. Just don’t forget the good maple syrup.

Salty Canadian Iced Latte
Ingredients
Method
- Fill a tall glass with ice cubes and pour the cold milk over them.
- In a measuring cup or small pitcher, combine the hot espresso, maple syrup, butter, and a pinch of salt.
- Immediately use a handheld frother or immersion blender to blend the mix until the butter is fully melted and a thick, velvety foam forms.
- Slowly pour the frothed coffee over the milk and ice, stir gently, and serve right away with or without a straw.
Nutrition
Notes
Tried this recipe?
Let us know how it was!Frequently Asked Questions
Source: Learn More About This Dish
Is salt in my coffee really necessary?
Yes, and it’s the one step I won’t let you skip. A pinch of flaky sea salt doesn’t make the drink taste salty. It makes the maple sweetness and the coffee flavor taste bolder and brighter. Without it, this salty Canadian iced latte falls flat. Trust the process.
What is a latte?
A latte is traditionally espresso with steamed milk and a thin layer of foam on top. This salty Canadian iced latte flips that idea: instead of steamed milk, you get cold milk over ice topped with a luscious frothed maple-butter espresso foam. Same spirit, completely different temperature.
Can I make an iced salted maple latte without an espresso machine?
Absolutely. Dissolve 1 to 2 teaspoons of instant espresso powder in 2 fluid ounces of hot water and use that as your base. Regular coffee won’t be concentrated enough to create the thick foam. Cold brew concentrate at about 1/4 to 1/2 cup also works well.
Can I make an iced salted maple latte vegan or dairy-free?
Yes. Swap in dairy-free butter sticks, not the spreadable kind, and use barista-style oat milk or soy milk. Dairy-free butters vary in salt content, so taste the base before frothing and adjust the flaky sea salt to get that perfect sweet-salty balance.
Can I make this latte warm instead of iced?
You can, and it’s genuinely cozy. Brew your espresso with the maple syrup and salt, then stir in butter until melted. Steam or heat your milk, pour it over the espresso, and top with a small pinch of flaky sea salt. No frother needed, the butter just melts right in.
What salt should I use for a salty Canadian iced latte?
Flaky sea salt is the gold standard here. Its light, crunchy crystals dissolve at the perfect pace and give that tiny savory pop at the end. Coarse kosher salt or pink Himalayan salt work in a pinch, just use a little less since their crystals are denser.