
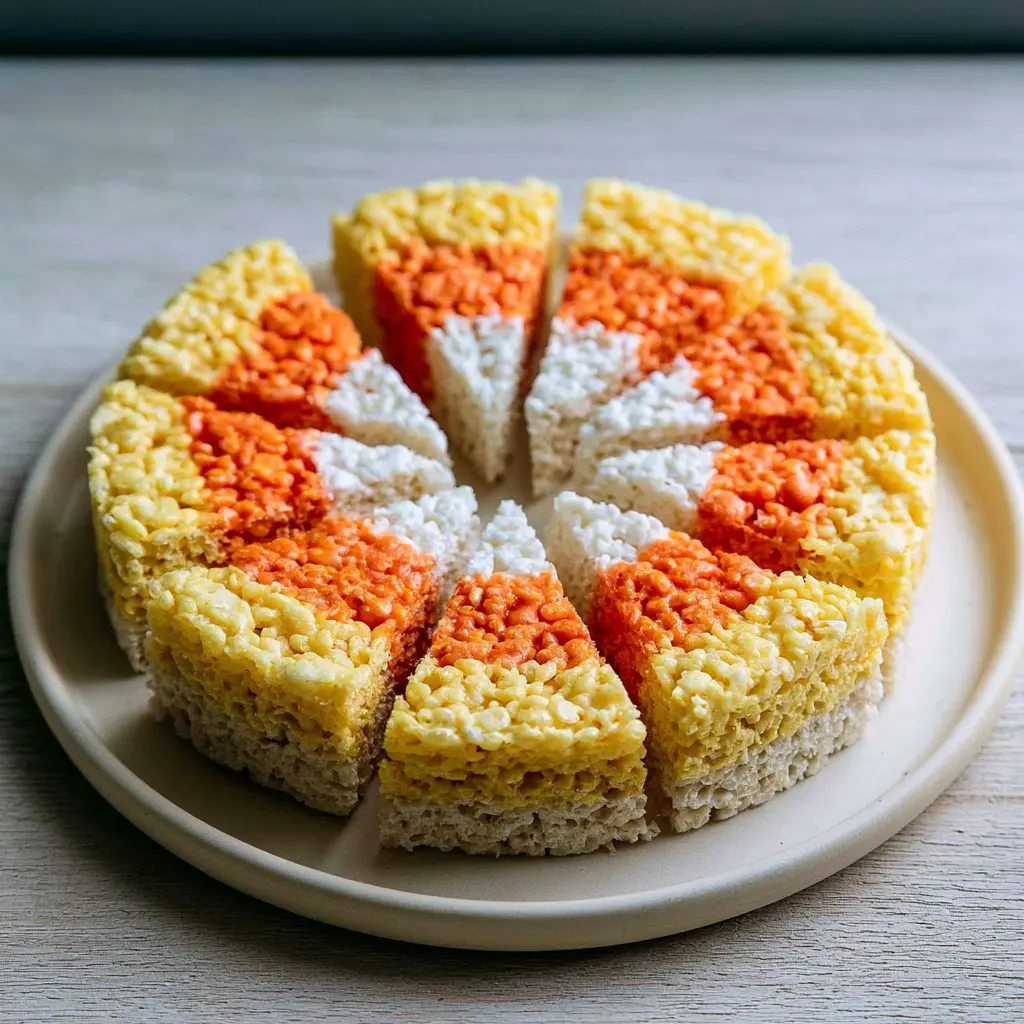
Why You’ll Love Candy Corn Rice Krispie Treats
Full disclosure: I’ve eaten candy corn straight from the bag while making these. Twice. Maybe three times, I lost count. But that’s exactly the energy you need for this recipe. It’s playful, nostalgic, and honestly, a little bit ridiculous in the best way.
These candy corn rice krispie treats are the Halloween version of that classic rice krispie treats recipe you grew up with. Three colorful layers, yellow, orange, and white, stacked in a round pan. Slice them into wedges and they literally look like giant candy corn. No oven required, so your kitchen stays cool even when it’s still 85 degrees outside in August.
This is a no-bake dessert that comes together in about 25 minutes. Which is great, because between school drop-offs and after-school activities, who has time for elaborate baking projects? Not me. And definitely not you.
What You’ll Need for These Halloween Rice Krispie Treats
The ingredient list is short and sweet. You probably have most of this already. The real magic is in the layering and the food coloring. Let’s break it down.
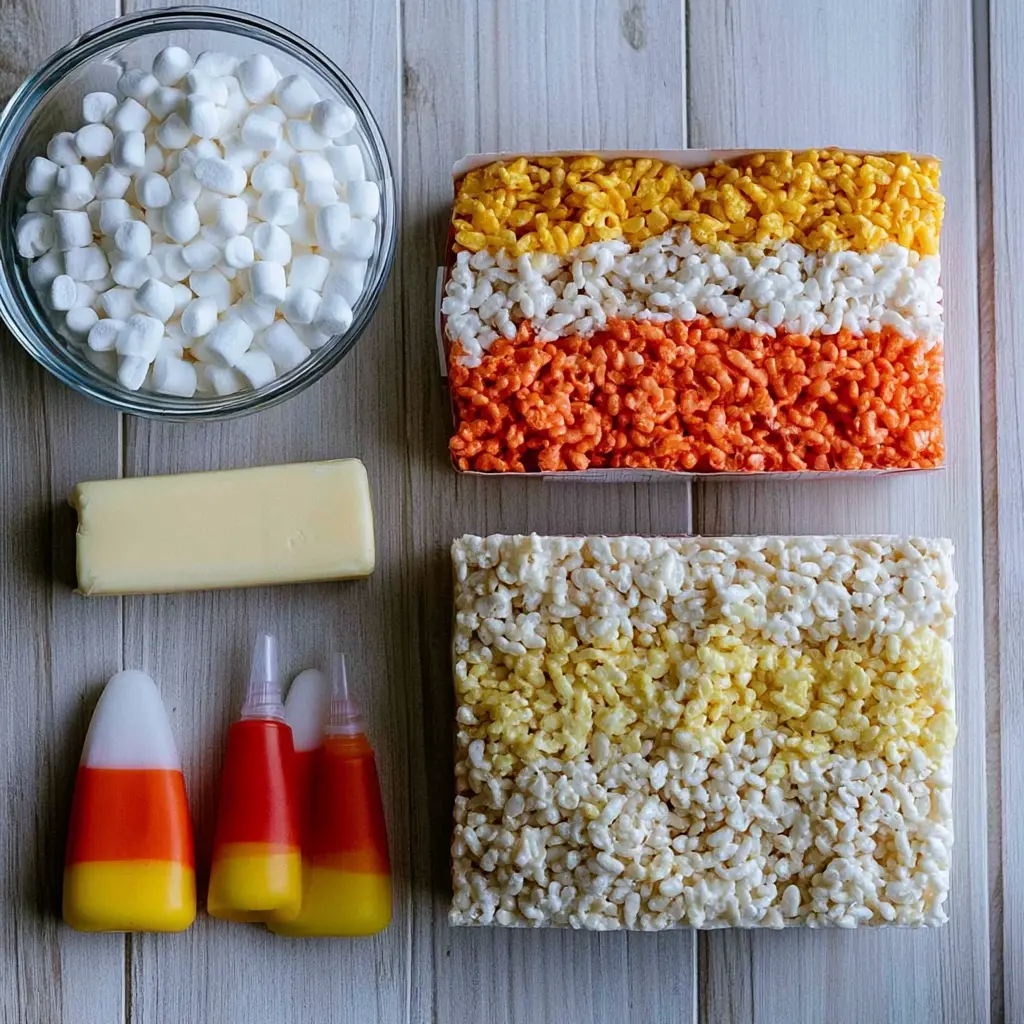
- Miniature marshmallows: These melt faster and more evenly than the big ones. You’ll need 2 1/2 cups for yellow, 1 3/4 cups for orange, and 3/4 cup for white.
- Butter: A little bit in each layer. It keeps the treats soft and adds that rich flavor. Science! Kind of. The fat coats the cereal and stops the marshmallow from seizing up into a brick.
- Salt: Trust me on this one. A big pinch in each layer balances all that sweetness. You won’t taste it, but the treats taste better.
- Yellow and red gel food coloring: Gel works better than liquid. It’s more concentrated, so you need fewer drops and the color comes out vibrant instead of washed out.
- Crisp rice cereal: The classic. Use a certified gluten-free one if you need this to be gluten-free. I usually grab whatever’s on sale at Ralphs, but name brand works too.
You’ll also need an 8 or 9 inch round cake pan. The round shape is what gives you those candy corn wedges when you slice it. Don’t have one? Any round baking dish works, just adjust the layering to fit.
Measure the mini marshmallows by pouring them into a liquid measuring cup. Don’t press them down flat or pack them. Just pour and let them settle naturally. Trust me, it messes up the ratios if you pack them.
How to Make Candy Corn Rice Krispie Treats
Alright, here’s where the fun happens. This is a microwave method, which means minimal cleanup and no standing over a hot stove. I’ll walk you through the four stages so you understand the rhythm. The recipe card below has the details.
Stage 1: Build the Yellow Layer
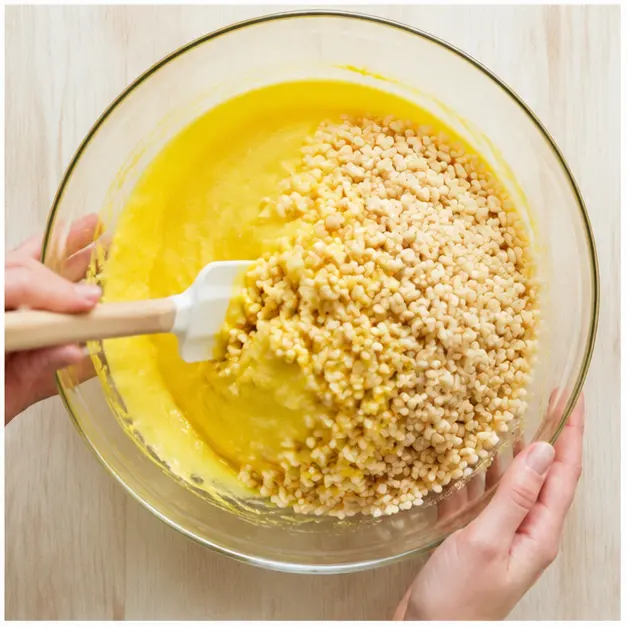
Start by greasing your round pan with nonstick spray or softened butter. Then combine your yellow layer marshmallows, butter, and a pinch of salt in a large microwave-safe bowl. Microwave on high for 30 seconds, stir, then heat in 15 second bursts until it’s smooth and glossy.
Stir in the yellow gel coloring. You want a bright, sunny yellow. Then fold in the crisp rice cereal until every single piece is coated. This is the moment where it starts to smell like childhood. You’ll know it’s ready when the marshmallow mixture feels like glossy lava, smooth, drippy, and slightly stretchy.
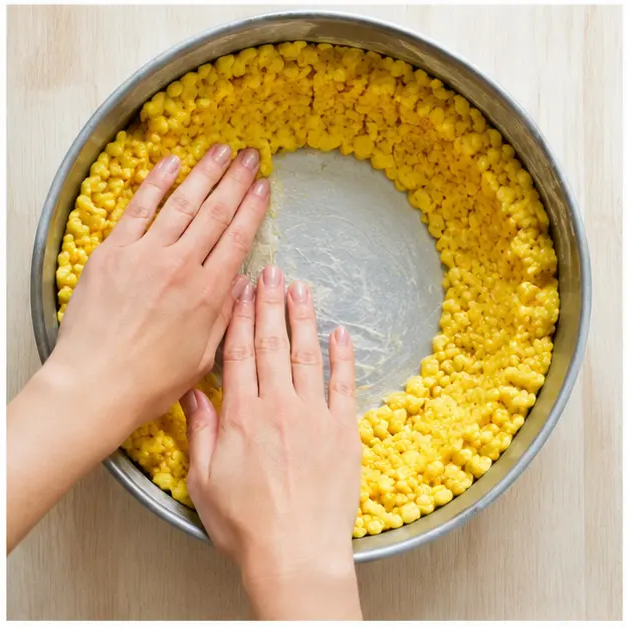
Now press the yellow mixture around the inside edges of the pan, forming a solid outer ring. Use buttered or lightly oiled hands if it sticks. Pack it firmly against the sides. Think of it like making a sandcastle. You want it compact enough to hold its shape.
Stage 2: Add the Orange Layer
Use the same bowl for the orange layer. I know, it’s a little messy, but it saves on dishes. Combine the orange layer marshmallows, butter, and salt. Microwave the same way until smooth. Stir in the yellow gel coloring, then add just one or two drops of red to get that warm orange tone.
Fold in the cereal and press the orange mixture inside the yellow ring. This creates the next stripe of your candy corn. It should sit snugly against the yellow, like nesting dolls made of marshmallow cereal.
Don’t overmix the color. You want a uniform orange, not a streaky one. If you’re unsure about the shade, hold it next to an actual candy corn. That’s my test every time.
Stage 3: Fill the Center with the White Layer
Here’s the critical step: use a clean bowl for the white layer. If you reuse the same bowl without washing it, the white will pick up yellow and orange residue and look dingy instead of bright. I learned this the hard way, and my white layer came out looking like a faint peach. Not cute.
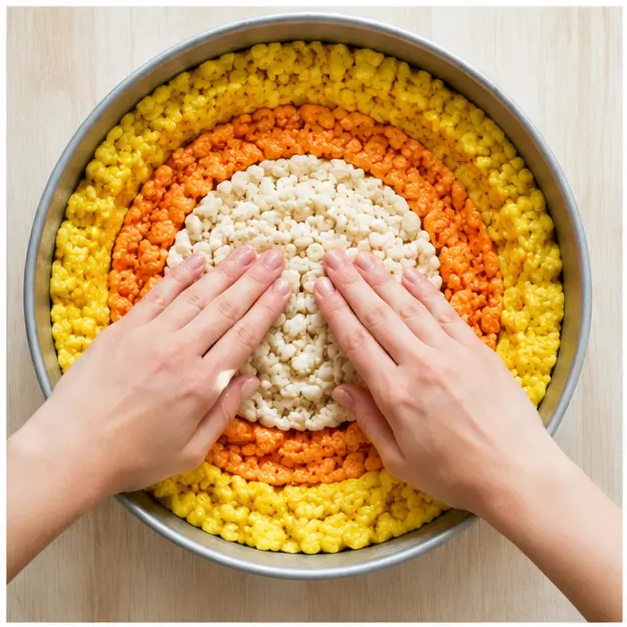
Melt the white layer marshmallows with butter and salt. No food coloring here. Then stir in the remaining cereal and press it into the center of the pan, filling that gap completely.
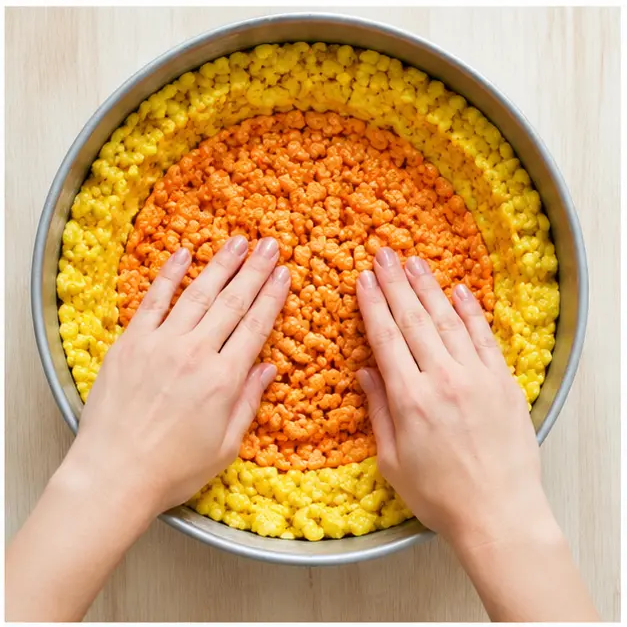
At this point, you should have a perfect bullseye of yellow, orange, and white. It’s genuinely satisfying to look at. Maybe take a photo before you slice it because after cutting, it becomes a different kind of beautiful.
Stage 4: Set, Slice, and Serve
Let the pan rest at room temperature for at least 2 hours. I know, patience is hard. But if you slice too early, the layers will squish together and you’ll lose that candy corn definition. Let it set completely.
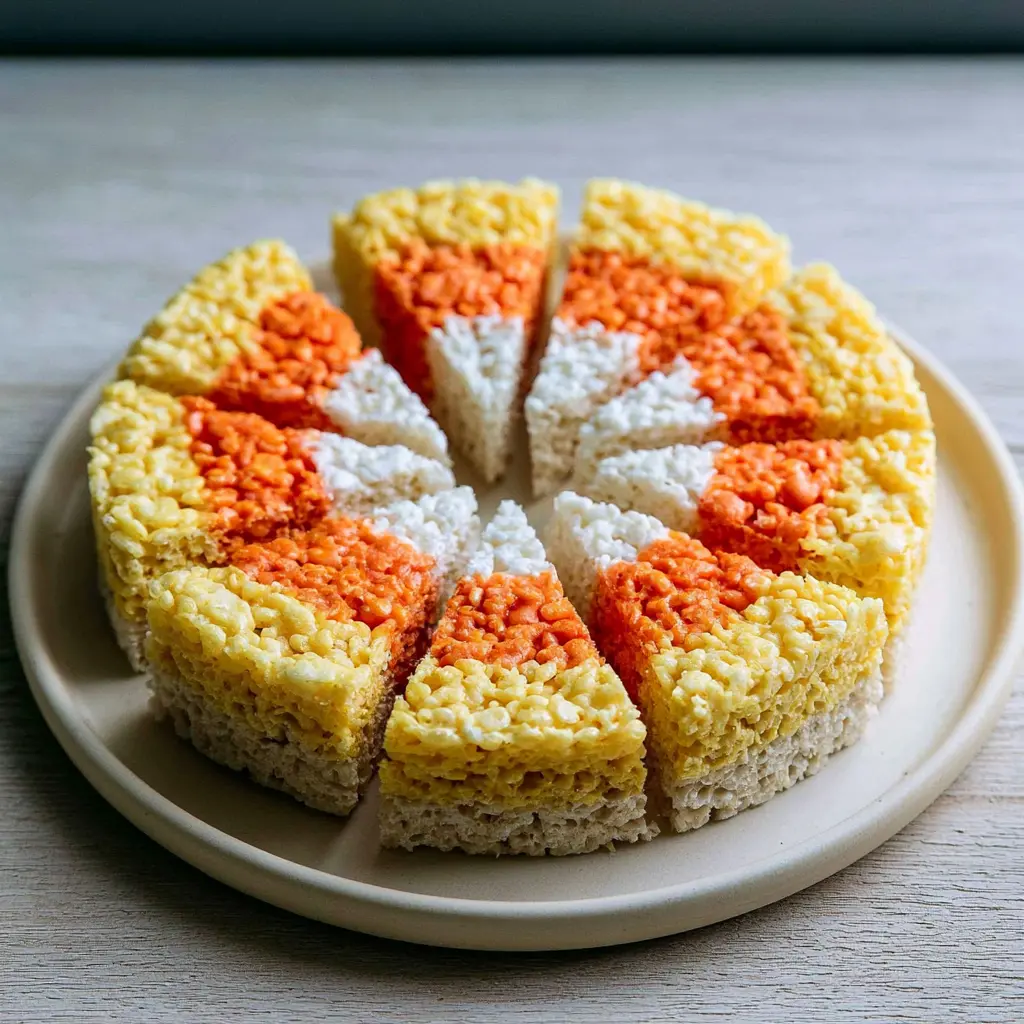
When you’re ready to serve, use a hot, wet knife or a buttered knife to slice into triangular wedges. Run the knife under hot water, wipe it dry, then slice. Clean cuts without dragging the marshmallow. That’s the trick.
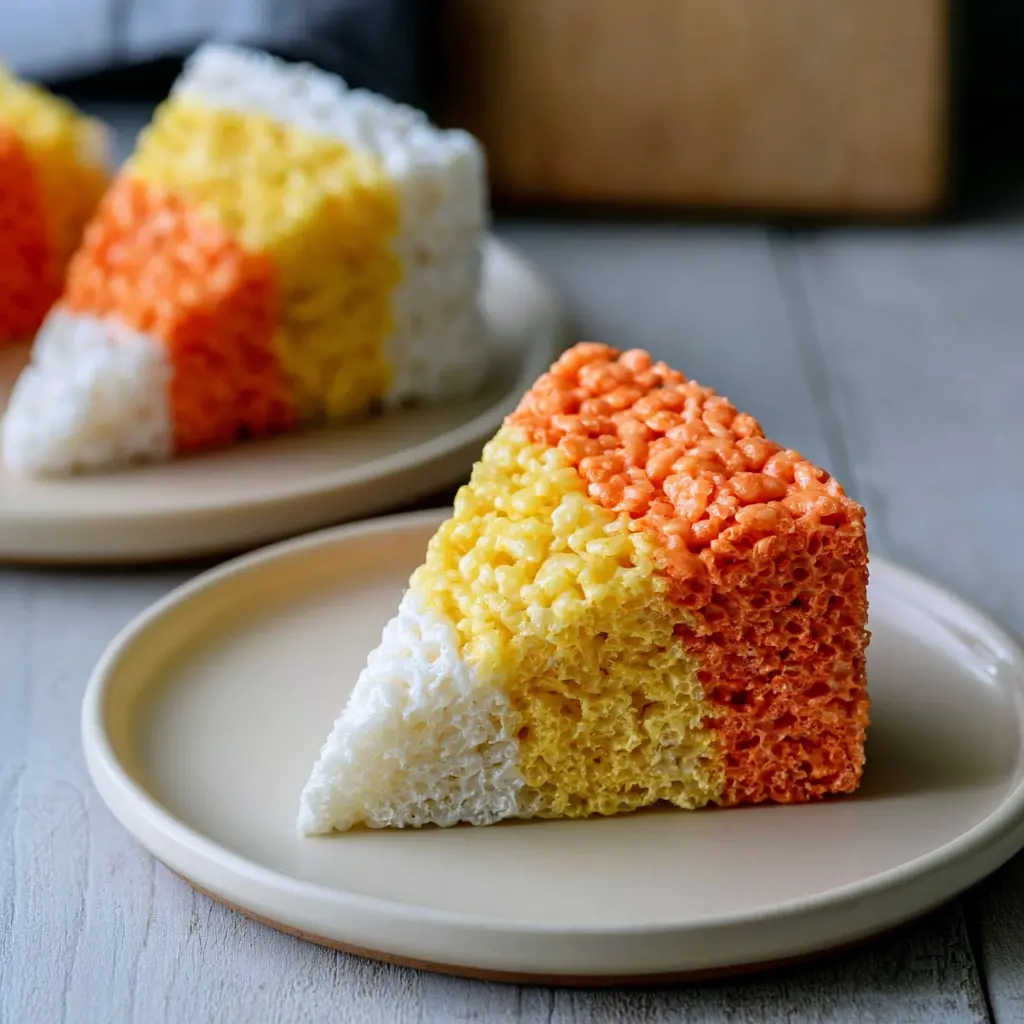
Each wedge looks like a giant candy corn. My kids literally cheered when I pulled these out. And then immediately argued over who got the biggest piece. So, classic family moment.
Tips for Perfect Candy Corn Treats Every Time
I’ve made these candy corn treats more times than I can count. Here’s what I’ve learned about avoiding the common pitfalls.
Troubleshooting Your Layered Cereal Bars
❌ Overheating the marshmallows, which makes them stiff: Microwave in short 15-second bursts and stir between each. Stop as soon as they’re smooth. If they start to pull away from the bowl, you’ve gone too far.
❌ Slicing before the treats have set: Wait the full 2 hours. Set a timer. The layers need time to firm up, or you’ll get a gooey mess.
❌ Reusing the bowl for the white layer without cleaning it: Your white layer will look orange. Just wash the bowl. It takes thirty seconds.
✅ Warm the mixture if it gets too stiff: If your marshmallow mixture becomes too hard to press, warm the bowl in the microwave for 5 to 10 seconds. It loosens right up.
Here are a few more things I wish someone had told me:
- Pack each layer firmly. A loose layer means gaps, and gaps mean the layers don’t stick together properly.
- Don’t over-stir. Over-stirring makes bricks. Mix until just combined, then stop. This is the difference between chewy vs hard texture.
- Use a round pan. The round shape gives you those candy corn wedges. A square pan works but you’ll get rectangles, which are less on theme.
Fun Variations for These Festive Halloween Snacks
Once you master the classic candy corn rice krispie treats, you can get creative. Here are some of my favorite twists on these marshmallow cereal bars.
Natural Food Coloring Swaps
If you want to skip the artificial stuff, use turmeric for yellow and a tiny bit of beet powder with turmeric for orange. The colors come out a bit more muted, but they’re still really pretty. The turmeric adds a slightly earthy note, but honestly, you won’t notice it.
Halloween Shape Cutters
For spooky treats for kids, use ghost, pumpkin, or cat shaped cookie cutters once the treats have cooled and set. Just press the cutter straight down and lift. Dust off the cutter between each press. My kids love the pumpkin ones best.
Tie-Dye Swirl Effect
Instead of distinct layers, swirl orange food coloring into the melted marshmallows for a festive tie-dye look. It’s less structured, but it’s a fun, groovy Halloween vibe. The colors blend together in a way that looks intentionally messy.
You can also use Halloween colors like green, purple, or black with M&Ms, black and orange sprinkles, or googley eyes on top. For a drizzle, white chocolate chips or yellow candy melts work great. Just keep in mind those are optional, so don’t stress if you skip them.
How to Store These Candy Corn Rice Krispie Treats
You can make these halloween rice krispie treats a day ahead, which is a lifesaver for school parties and Halloween events. Here’s how to keep them fresh.
Store leftover treats in an airtight container at room temperature for up to 3 days. If you live in a humid climate, they can get a little sticky. Pop a sheet of wax paper between layers to keep them from sticking together. Wax paper is better than parchment here because the treats don’t stick to it as much.
If the treats start to feel a bit stale, microwave a slice for 5 seconds. It won’t be exactly like fresh, but it’s close enough for a sweet tooth.
You can also freeze them. Wrap individually in plastic wrap, then pop them in a freezer bag for up to 3 months. Thaw at room temperature, and they’ll still be good. It’s one of the easiest candy corn recipes out there for making ahead.
Serving Ideas for Halloween Parties
These treats are already pretty on their own, but here are a few ways to dress them up for a party.
- Serve on sticks: Insert a popsicle stick into each wedge before serving. Instant party food that keeps fingers clean.
- Wrap individually: Use clear treat bags tied with orange and black ribbon. Perfect for classroom snack ideas or party favors.
- Cut smaller wedges: Make them bite-sized for a crowd. Cut smaller wedges for parties or use a round cutter for Halloween shapes.
- Display on a cake stand: Arrange the wedges in a circle on a cake stand. The colors pop against a white or black backdrop.
I made these for my daughter’s classroom Halloween party last year, and they were the first thing to disappear. One of the moms asked for the recipe, and then three other moms did too. That’s the ultimate compliment, right?
The Last Bite
These candy corn rice krispie treats are everything I want in a Halloween dessert. They’re festive without being fussy. They’re sweet and nostalgic. And they come together in under 30 minutes with zero oven time. That’s a win in my book.
Plus, this is a kids can make these kind of recipe. My 7-year-old helps with the stirring and pressing. It’s messy, chaotic, and absolutely adorable. She gets so proud when she sees the finished layers.
If you make these, I want to see your results. The messy, gorgeous, candy-corn-perfect results. Tag me or share your photos on my Pinterest page and show off your work. I love seeing what you create, and honestly, it makes my whole day.
Happy Halloween baking! May your layers be even and your marshmallows stay soft.
Candy Corn Rice Krispie Treats
Ingredients
Method
- Lightly coat an 8 or 9 inch round cake pan with nonstick cooking spray or a thin layer of softened butter.
- For the yellow layer, combine 2 1/2 cups of the marshmallows, 2 tablespoons of the butter, and a pinch of salt in a large microwave-safe bowl. Microwave on high for 30 seconds, stir, then heat in 15 second bursts until smooth and fully melted. Stir in 5 drops of yellow gel coloring, then fold in 2 1/4 cups of the crisp rice cereal until every piece is coated.
- Press the yellow mixture around the inside edges of the prepared pan to form a solid outer ring. Use buttered or lightly oiled hands if it sticks, and pack it firmly against the sides.
- In the same bowl, make the orange layer using the orange layer marshmallows, butter, salt, yellow and red gel colors, and the 1 1/4 cups plus 2 tablespoons of cereal. Microwave and stir exactly as before, then press the orange mixture inside the yellow ring to create the next stripe.
- In a clean bowl, melt the white layer ingredients (white layer marshmallows, butter, and salt) until smooth, then stir in the remaining 3/4 cup cereal. Press the white mixture into the center of the pan, filling the gap.
- Let the pan rest at room temperature for at least 2 hours so the layers set completely. Slice into triangular wedges before serving.
Nutrition
Notes
Tried this recipe?
Let us know how it was!Frequently Asked Questions
Source: Learn More About This Dish
How do you make candy corn rice krispie treats with food coloring?
Melt marshmallows and butter in the microwave, then stir in gel food coloring. For yellow, add 5 drops of yellow. For orange, add 5 drops of yellow plus 1 to 2 drops of red. Fold in cereal and layer each color into a round pan.
Can I use regular food coloring instead of gel for candy corn rice krispie treats?
You can, but gel is better. Liquid food coloring is more diluted, so you’ll need more drops to get the same vibrant color. That extra liquid can make the marshmallow mixture slightly stickier and harder to handle.
How long do candy corn rice krispie treats stay fresh?
Store them in an airtight container at room temperature for up to 3 days. Use wax paper between layers to prevent sticking. They’re best in the first 2 days while the marshmallow is still soft.
What is the best way to layer the colors for halloween rice krispie treats?
Press the yellow mixture around the outside edges of a round cake pan to form a ring. Then press the orange mixture inside that ring. Finally, fill the center with the white layer. This creates the classic candy corn wedge shape.
Can you freeze candy corn treats to make them last longer?
Yes. Wrap each wedge individually in plastic wrap, then place them in a freezer bag. They’ll keep for up to 3 months. Thaw at room temperature and enjoy them within a day or two.