
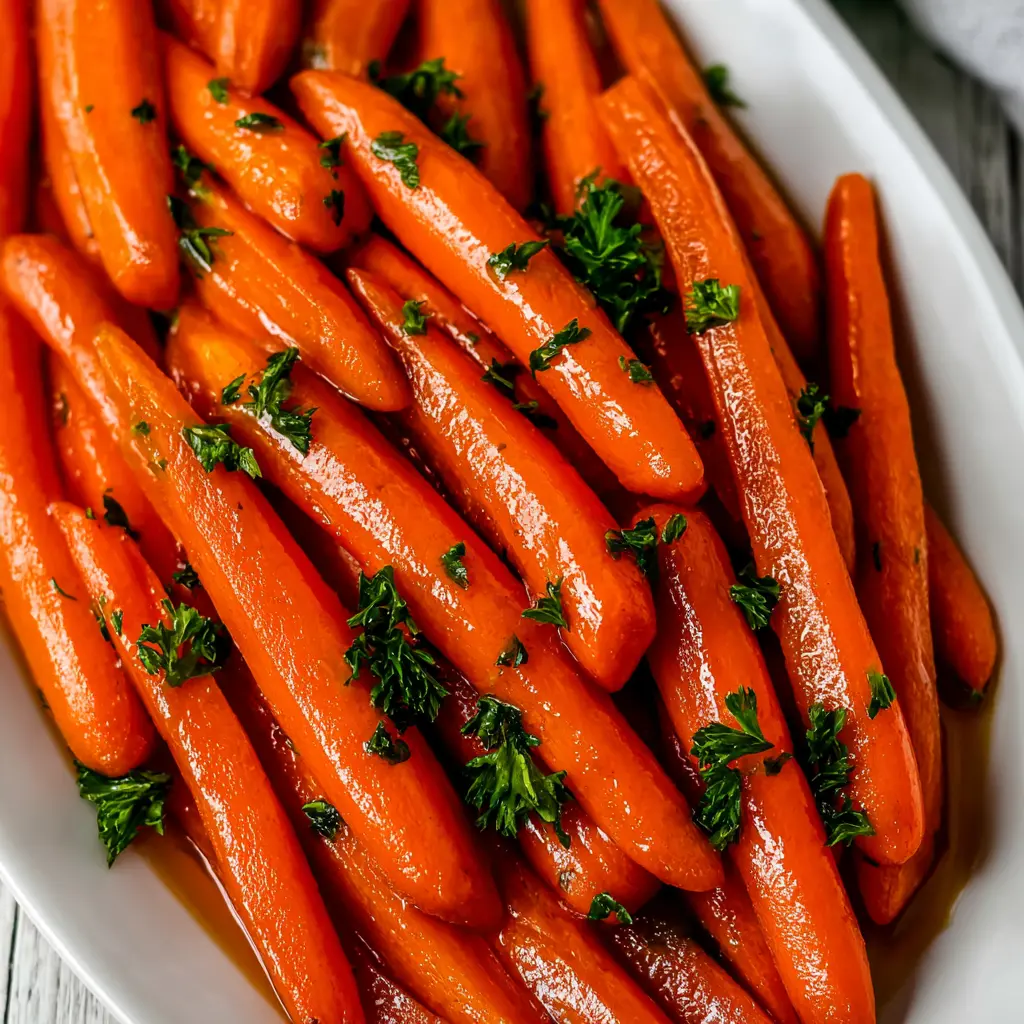
Brown Sugar Glazed Carrots with a California Touch
Ingredients
Method
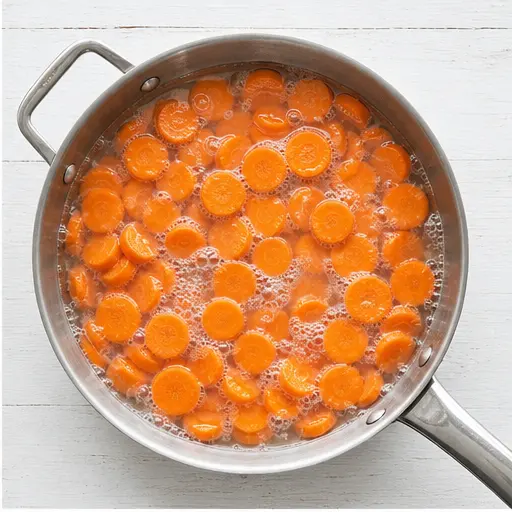
- Place the sliced carrots in a large skillet or saucepan. Add enough water to cover them by about 1 inch. Bring to a boil over high heat and cook until the carrots are tender-crisp, about 5 minutes (timing depends on thickness). They will cook a bit more in the next step, so drain them as soon as they are nearly done. Pour off the water and return the carrots to the pan.
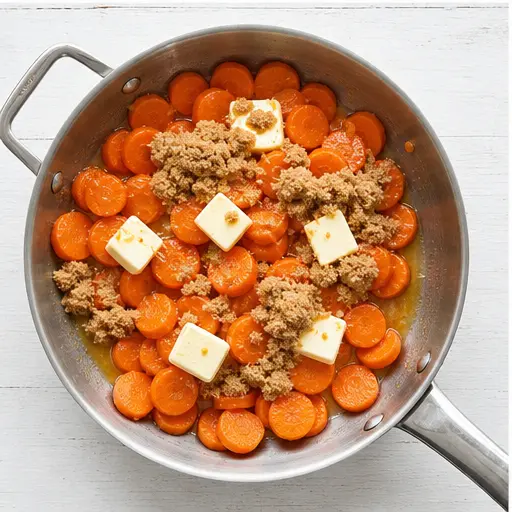
- Add the butter, brown sugar, lemon juice, and cinnamon to the pan with the carrots. Cook over medium heat (reduce to medium-low if the mixture bubbles too vigorously) for about 5 minutes, stirring occasionally, until the sauce thickens slightly and the carrots are cooked to your liking.
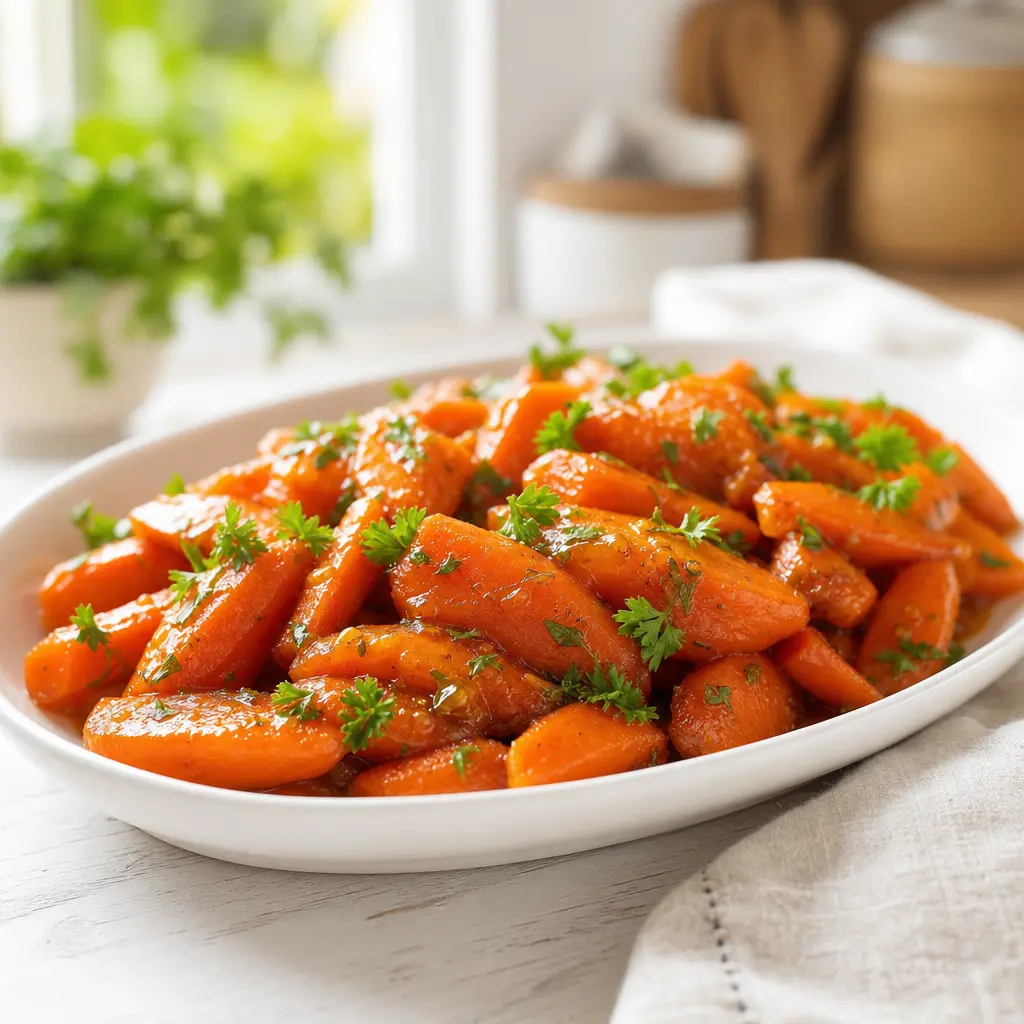
- Season with salt and pepper to taste. Serve immediately, garnished with chopped parsley if desired.
Nutrition
Notes
Tried this recipe?
Let us know how it was!Why This Recipe Works
Remember that sad little bowl of plain carrots at every potluck? The ones that sat there untouched, looking all lonely and forgotten? Yeah, not anymore. These brown sugar glazed carrots are the ones that disappear first. I’m not kidding.
I used to be that person who brought the sad carrots. It was a holiday a few years back, and I was so nervous about the turkey that I completely neglected the sides. The carrots came out watery, bland, and honestly? Embarrassing. My aunt patted my hand and said, “It’s the thought that counts.” Ouch.
So I went back to the kitchen determined to figure this out. And after a lot of trial and error (okay, some burnt sugar situations), I landed on this version. What makes it special? A little California twist Meyer lemon and a whisper of cinnamon. It’s not your average glazed carrots recipe. It’s better.
Here’s why you’ll love it:
- It’s fast. We’re talking 25 minutes from start to finish. Perfect for busy weeknights or when you’re juggling a dozen dishes for a holiday.
- Simple ingredients. You probably have most of these in your pantry right now. No fancy stuff required.
- Kid-approved. The sweet buttery glaze? It’s basically candy for vegetables. My nephew calls them “candy carrots” and asks for seconds.
- Forgiving. Mess up the glaze? No worries. We’ll fix it together.
The secret is in the technique. You parboil the carrots first so they’re tender but still have a little bite. Then you let them finish cooking in the glaze, letting that brown sugar and butter mixture reduce into something magical. The Meyer lemon at the end cuts through the sweetness and makes everything pop.
Let’s get into it.
Ingredients for Brown Sugar Glazed Carrots
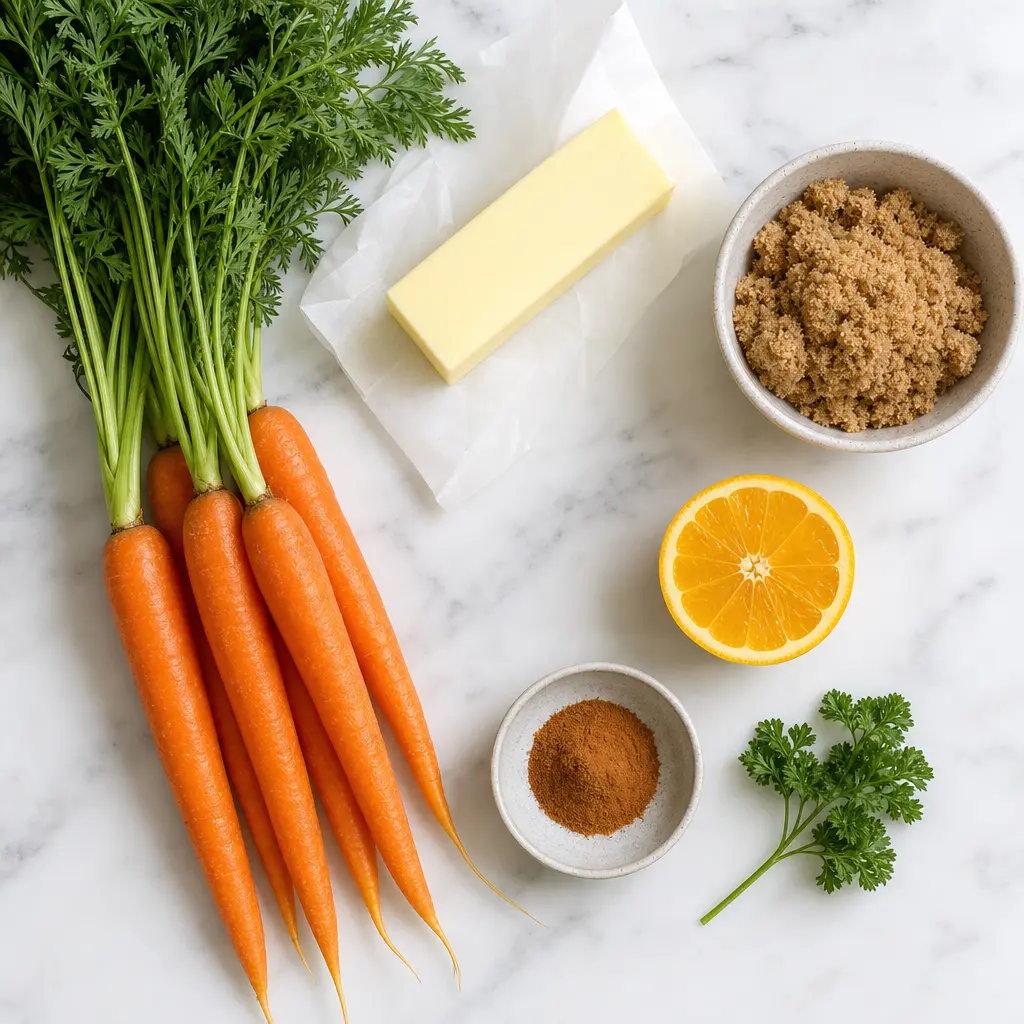
You don’t need a long grocery list for these glazed carrots. Just a handful of things that work together beautifully.
- Carrots (1 pound): Regular orange carrots are perfect. Look for ones that are firm and bright. If you want to get fancy, rainbow carrots look stunning here. Just make sure they’re all about the same thickness so they cook evenly.
- Unsalted butter (3 tablespoons): I use unsalted so I can control the salt level. Cut it into pieces so it melts evenly into the glaze.
- Packed brown sugar (1/4 cup): Light or dark, both work. Dark gives a deeper, almost molasses-y flavor. Light keeps it more delicate. I usually go with light brown sugar for this.
- Fresh Meyer lemon juice (1 teaspoon): This is the California touch. Meyer lemons are sweeter and less acidic than regular ones. If you can’t find them, regular lemon juice works fine. But if you see Meyer lemons at the farmers market, grab them.
- Ground cinnamon (1/8 teaspoon): Just a pinch. It’s not meant to be a cinnamon-forward dish. It’s more of a warm background note that makes people go, “What’s that flavor? It’s good.”
- Salt and pepper: To taste. Don’t skip the salt it balances the sweetness.
- Fresh flat-leaf parsley (1 tablespoon, chopped): For garnish. It adds a pop of green and freshness.
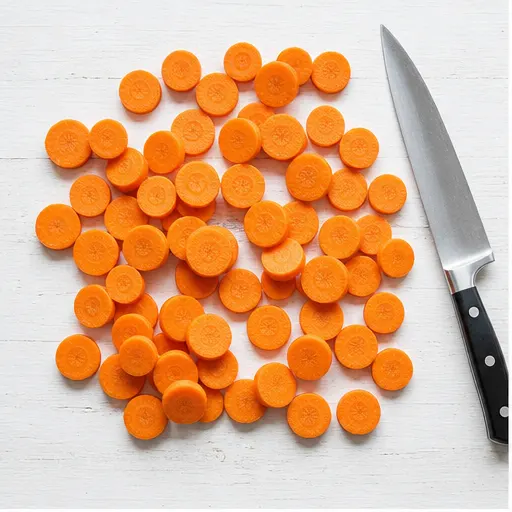
Pro tip from someone who learned the hard way: cut your carrots into uniform pieces. I know, it feels tedious. But if some are thick and some are thin, you’ll end up with a mix of mushy and crunchy. Not ideal. We want tender-crisp across the board.
How to Make Brown Sugar Glazed Carrots
Okay, let’s walk through this together. I’ll break it into four stages so you know exactly what’s happening at each point. And don’t worry I’ll tell you what to look for so you can cook with confidence, not a timer.
Stage 1: Parboil the carrots.
Slice your peeled carrots into 1/4-inch rounds. Even is key here. Toss them in a large skillet or saucepan and add enough water to cover by about an inch. Bring it to a boil over high heat.
Cook for about 5 minutes. But here’s the thing don’t just set a timer and walk away. Watch them. You want them tender-crisp, meaning a knife slides in with a little resistance. They’ll cook more in the glaze, so pull them when they’re almost done. Overcook them now, and you’ll get mushy carrots later.
Drain them and return them to the pan.
Stage 2: Build the glaze.
Add the butter, brown sugar, lemon juice, and cinnamon to the pan with the carrots. Turn the heat to medium. You’ll see the butter melt and the sugar start to dissolve. Give it a gentle stir.
If the mixture starts bubbling too aggressively, turn it down to medium-low. We want a gentle simmer, not a crazy boil. This is where the magic happens.
Stage 3: Let the glaze reduce.
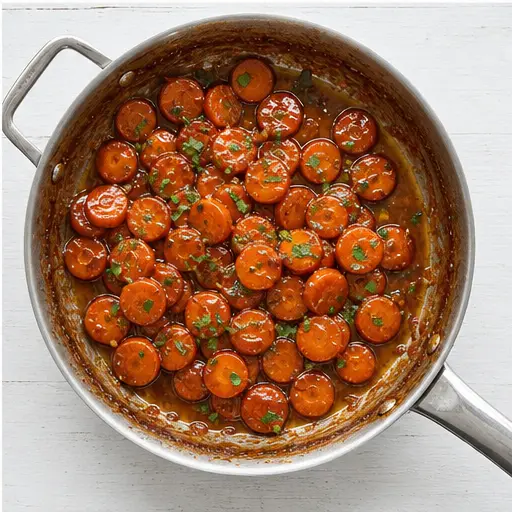
Cook for about 5 minutes, stirring occasionally. Don’t stir constantly you want some caramelization to happen. Let the carrots sit for a bit so the sugars can concentrate and get sticky.
You’ll know it’s working when the liquid starts to thicken and coats the back of a spoon. The carrots will look glossy and almost candied. If your glaze looks too thin, don’t worry just let it reduce a minute longer. If it’s getting too thick too fast, add a splash of water.
Stage 4: Season and serve.
Season with salt and pepper. Taste it. Does it need more salt? A tiny bit more lemon? Adjust as you like. Then transfer to a serving dish and garnish with the chopped parsley.
Serve immediately. These are best hot, straight from the pan.
Tips for Perfect Glazed Carrots
I’ve made these glazed carrots more times than I can count. Here’s what I’ve learned:
- Don’t overcook in the boiling step. This is the number one mistake. The carrots should still have a little bite when you drain them. They’ll finish cooking in the glaze.
- Cut uniformly. Size matters. If your pieces are all different sizes, some will be mushy while others are crunchy. Take the extra 30 seconds to make them even.
- Don’t stir too often. I know it’s tempting to keep moving things around. But letting the carrots sit helps them caramelize. Stir every minute or so, not constantly.
- Watch the heat. If the glaze is bubbling too hard, the sugar can burn before the carrots are done. Medium-low is your friend.
- If the glaze is too thin: Let it reduce a bit longer. If it’s still not thickening, turn the heat up slightly and keep cooking.
- If the glaze is too thick: Add a tablespoon of water and stir. It’ll loosen right up.
- Use both oil and butter? Some folks swear by this to prevent burning. For this stovetop method, butter alone works great. But if you want, you can substitute half the butter with a good California olive oil.
Variations and Substitutions
One of the best things about this sliced carrots recipe is how flexible it is. Here are some ways to make it your own:
- Vegan option: Use olive oil instead of butter. The glaze will be a little different but still delicious.
- Different sweeteners: Swap the brown sugar for honey or maple syrup. Use the same amount. Honey gives a floral note, maple adds a woodsy depth.
- Less sugar: Reduce the brown sugar to 2 tablespoons. The carrots will be less sweet but still tasty. Add a pinch more cinnamon to compensate.
- Spice it up: Add a pinch of cayenne pepper for heat. The sweet and spicy combo is amazing.
- Herb swap: Use fresh dill instead of parsley for a different fresh note.
- Baby carrots: You can use baby carrots, but they’ll take a little longer to cook. Cut them in half lengthwise so they’re more uniform.
This is a forgiving recipe. Don’t stress about getting it exactly right. The first time I made it, I used dark brown sugar instead of light and added too much cinnamon. It was still gone in five minutes.
Storage and Make-Ahead Tips
These brown sugar glazed carrots are perfect for making ahead, which is a lifesaver during the holidays.
To make ahead: Cook the carrots without the glaze (just parboil them), then let them cool completely. Store them in an airtight container in the fridge for up to 3 days. When you’re ready to serve, reheat them with the glaze ingredients in a skillet over medium heat.
To store leftovers: Put them in an airtight container in the fridge. They’ll keep for up to 3 days. The texture will soften a bit, but they’re still delicious.
To reheat: Gently warm them on the stovetop over medium heat with a splash of water to loosen the glaze. Or microwave in 30-second bursts until heated through. Don’t overdo it or they’ll get mushy.
Freezing: I don’t recommend it. The texture gets too soft and watery. These are best fresh or within a few days.
One more thing: if you’re making these for a big holiday meal, they’re a great option because they don’t need the oven. You can have them going on the stovetop while your turkey or roast rests. No competition for oven space.
Frequently Asked Questions
I really hope you try these brown sugar glazed carrots. They’ve become my go-to side dish for everything from summer BBQs to Thanksgiving. The first time I brought them to a family gathering, my uncle asked for the recipe. That never happens.
If you make them, tag me in your results! I love seeing these come to life in your kitchens. And if you have questions, drop them in the comments. I’m here to help.
Happy cooking!
Source: Nutritional Information
Best carrots to use for glazed carrots?
Regular orange carrots are perfect. Look for ones that are firm, smooth, and about the same thickness. Rainbow carrots work great too and look beautiful on the plate. Avoid baby carrots unless you cut them in half they’re too thick and won’t cook evenly.
How long does it take to roast carrots?
For roasted glazed carrots, you’d roast at 400°F for about 25-30 minutes. But this recipe uses the stovetop method, which takes just 15 minutes total. The stovetop gives you more control over the glaze and is faster for busy nights.
These are too sweet for my taste!
No problem. Reduce the brown sugar to 2 tablespoons or even 1. You can also add a little more lemon juice to balance the sweetness. A pinch of salt helps too. The recipe is forgiving adjust to your preference.
Can you make glazed carrots ahead of time?
Yes. Parboil the carrots without the glaze, cool them, and store in the fridge for up to 3 days. When you’re ready, reheat them with the glaze ingredients in a skillet. This is a great holiday strategy to save time.
How long should I roast carrots?
For roasted carrots, 400°F for 25-30 minutes works well. But this stovetop method is faster just 5 minutes to parboil and 5 minutes to glaze. The stovetop gives you a thicker, stickier glaze that coats each piece perfectly.
Can I use baby carrots for this recipe?
You can, but I recommend cutting them in half lengthwise. Whole baby carrots are too thick and won’t cook evenly. The 1/4-inch rounds from regular carrots give you the best texture and glaze coverage.
Do I need to peel the carrots first?
Yes, for the best texture. Peeling removes the outer layer that can be tough and slightly bitter. If you’re using very fresh, thin-skinned carrots from the farmers market, you can scrub them well and leave the peel on.
Are balsamic carrots vegan or gluten-free?
This recipe is naturally gluten-free, so no worries there. For a vegan version, substitute the butter with olive oil. The glaze will be a little different but still delicious. Use a good California olive oil for the best flavor.
Can I make them ahead of time?
Yes, and I do this all the time. Parboil the carrots, cool them, and refrigerate. When you’re ready to serve, reheat with the glaze. It takes just 10 minutes and makes holiday cooking so much less stressful.
5 Responses
I added a splash of orange juice along with the lemon and it was divine. Also threw in some toasted pecans at the end for crunch. This is going into my regular rotation. The story about the sad carrots made me laugh—glad you redeemed yourself!
Good recipe but I found the glaze a bit too sweet for my taste. Next time I’ll cut the brown sugar to 2 tablespoons and maybe add a pinch more salt to balance it. The parboiling tip was spot on though—carrots came out perfectly tender.
Made these for Easter dinner and they were a huge hit! The Meyer lemon and cinnamon really elevate them beyond the usual glazed carrots. My kids devoured them and asked for ‘candy carrots’ again next week. Thanks for sharing!
Can I substitute regular lemon juice for Meyer lemon? I can’t find Meyer lemons in my local store. Also, would this work with baby carrots or do I need to cut them differently?
Hi Jennifer! Yes, regular lemon juice works perfectly fine—just use about 1 teaspoon as written. For baby carrots, I’d recommend halving them lengthwise if they’re thick so they cook evenly. Enjoy!