
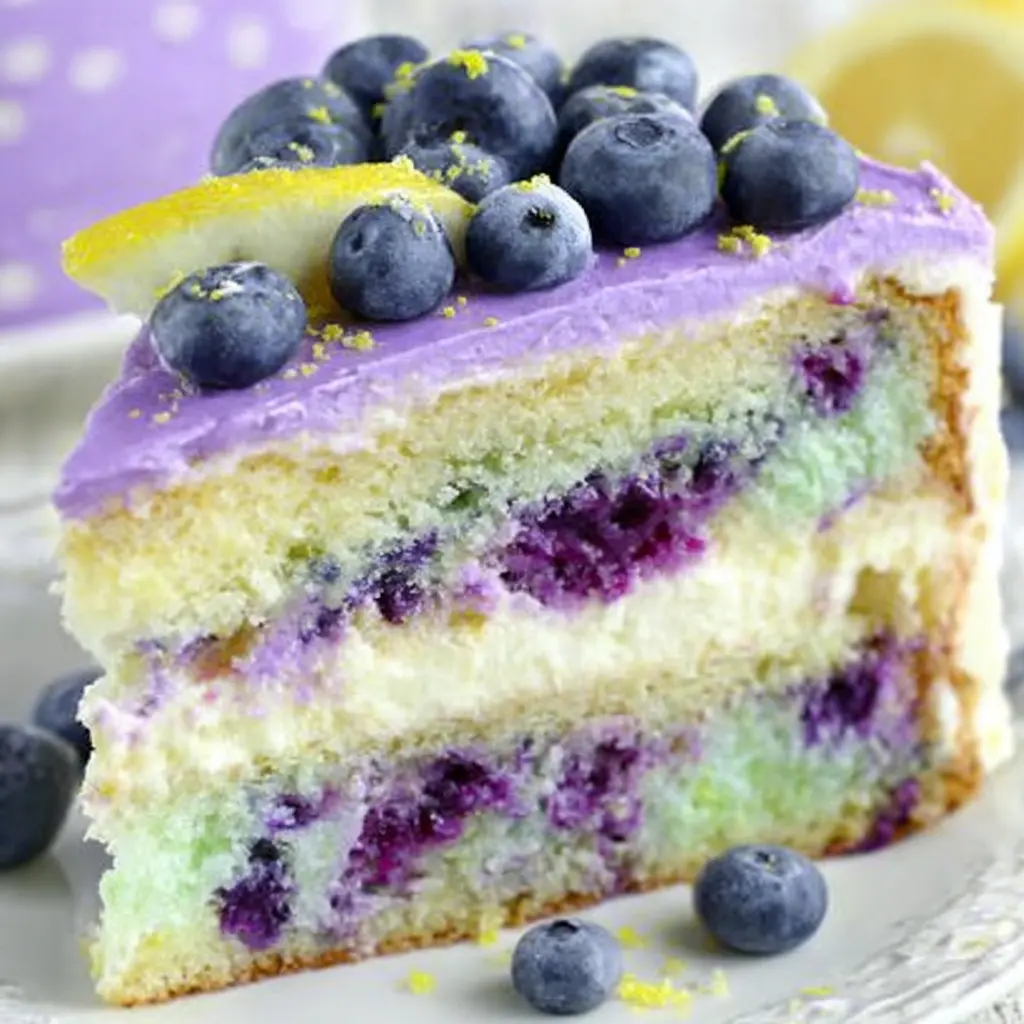
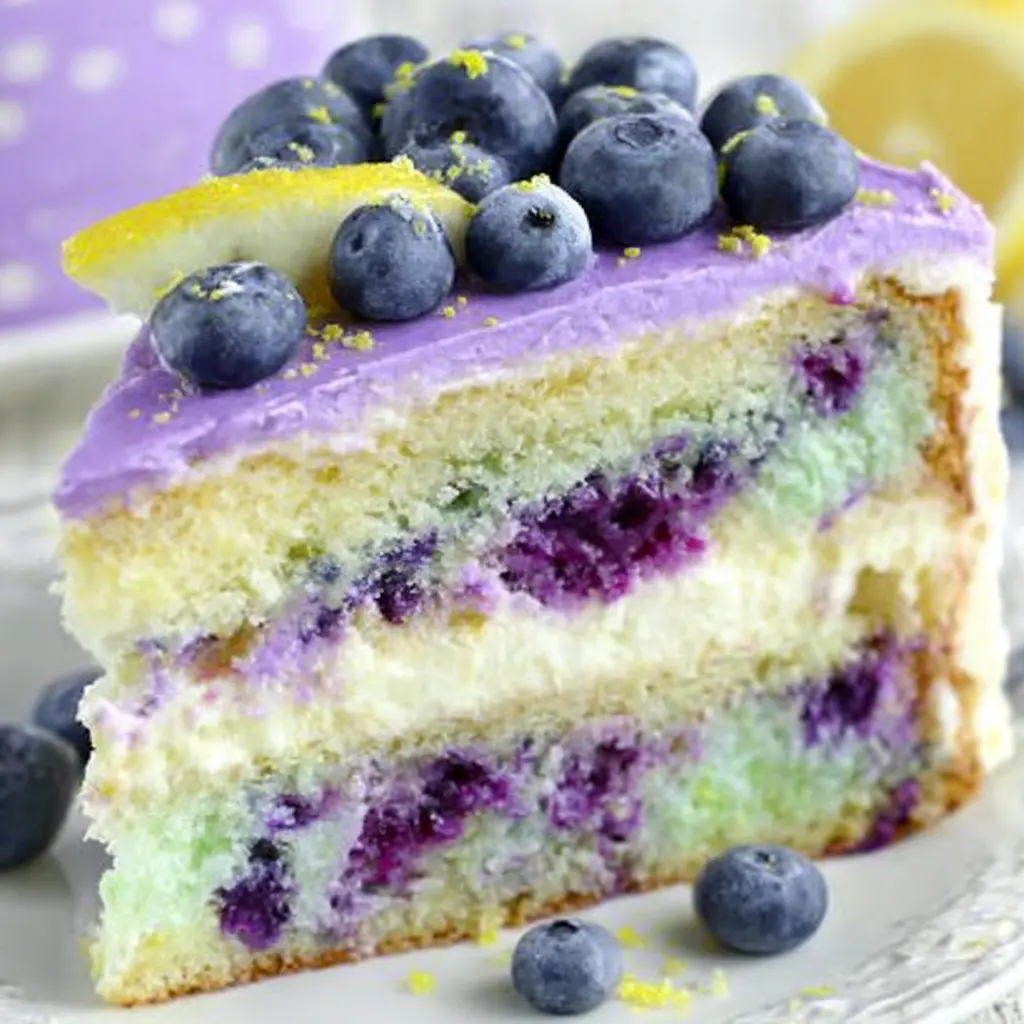
Lemon Blueberry Cheesecake Layer Cake
Ingredients
Method
- Preheat the oven to 350 F. Lightly grease 8-inch springform pan and line the bottom with parchment paper. Wrap springform pan in double layer of heavy-duty aluminum foil to prevent water from leaking in during the baking in a water bath.
- To make the cheesecake pulse blueberries and cream cheese in a food processor, then transfer the mixture in a mixing bowl.
- Add sugar and flour and beat until smooth and creamy. Mix in vanilla.
- Add eggs, one at the time mixing after each addition just to combine, do not over mix.
- Finally mix in sour cream and heavy cream. Pour the batter into springform pan and smooth the top, then place in a roasting pan. Pour boiling water in roasting pan halfway up the side of the springform pan and make sure no water drip on the batter and bake 40-45 minutes or until the center has set.
- Remove springform pan from water bath, then run a thin knife around the cake and cool to a room temperature, then place in the fridge for a few hours or overnight to cool completely.
- Preheat oven to 350 F, butter and lightly flour two 8-inches round cake pans and line the bottoms with parchment paper circles.
- Sift together 2 cups flour, corn starch, baking powder and salt and set aside.
- Stir together milk and lemon juice and set aside to curdle.
- Beat butter and sugar on medium-high until pale and fluffy, about 4 minutes.
- With the mixer running on low, add eggs one at a time and mix after each addition.
- Add vanilla extract and lemon zest and mix to combine.
- First add 1/3 of the flour mixture, then add half of the milk mixture, then 1/3 of the flour mixture, then remaining milk mixture milk, and finish with the flour mixture. Mix to combine after each addition, but do not over mix.
- In a small bowl, gently toss blueberries with flour to coat, then gently fold blueberries into batter, being careful not to break the berries.
- Divide batter evenly between pans, smooth the top and bake for 30-35 minutes, until toothpick inserted into center comes out clean. Cool the cakes in the pans for 10 to 15 minutes, then remove to wire rack to finish cooling.
- Mix the butter and cream cheese on medium speed until no lumps remain. Do not over beat before the sugar was added or may end up with a runny frosting.
- Add vanilla, salt and lemon zest and mix until combined.
- Gradually add powdered sugar until desired sweetness and thickness is reached. Scrape down the sides of the bowl and beat until smooth.
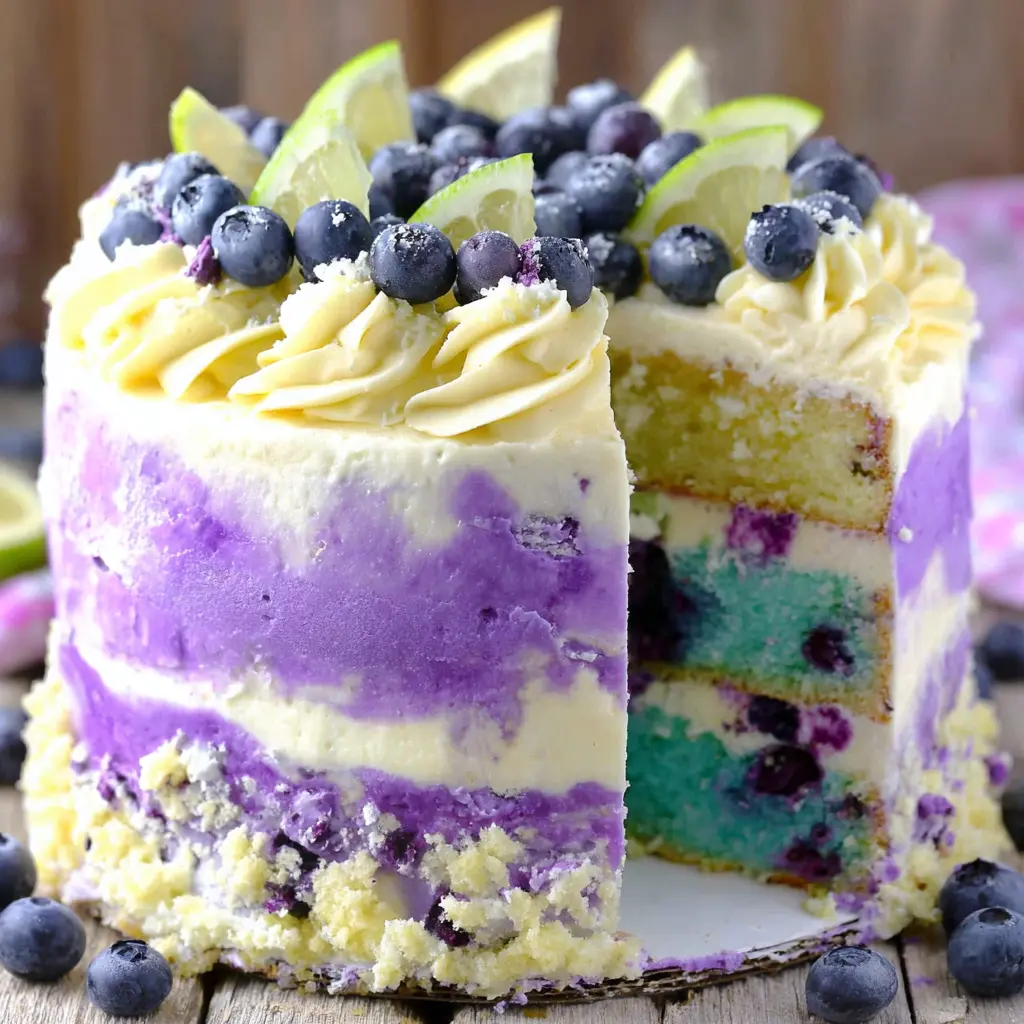
- Place one layer of cake onto serving plate and top with thin layer of lemon cream cheese frosting. Place blueberry cheesecake layer and top with thin layer of frosting. Finally, top with second cake layer and frost cake with remaining frosting. Decorate with lemon wedges and fresh blueberries if desired. Refrigerate for at least 45 minutes before cutting or else the cake may fall apart as you cut.
- Store in the fridge.
Nutrition
Notes
Tried this recipe?
Let us know how it was!Why This Lemon Berry Cheesecake Cake Will Steal the Show
You know that moment when you’re planning a Mother’s Day brunch and you want something that screams “I put thought into this” without actually screaming in your kitchen? That’s where this Lemon Berry Cheesecake Cake comes in. I’ve been making versions of this for years, and honestly, it’s the dessert that gets the most “wait, you made this?” reactions.
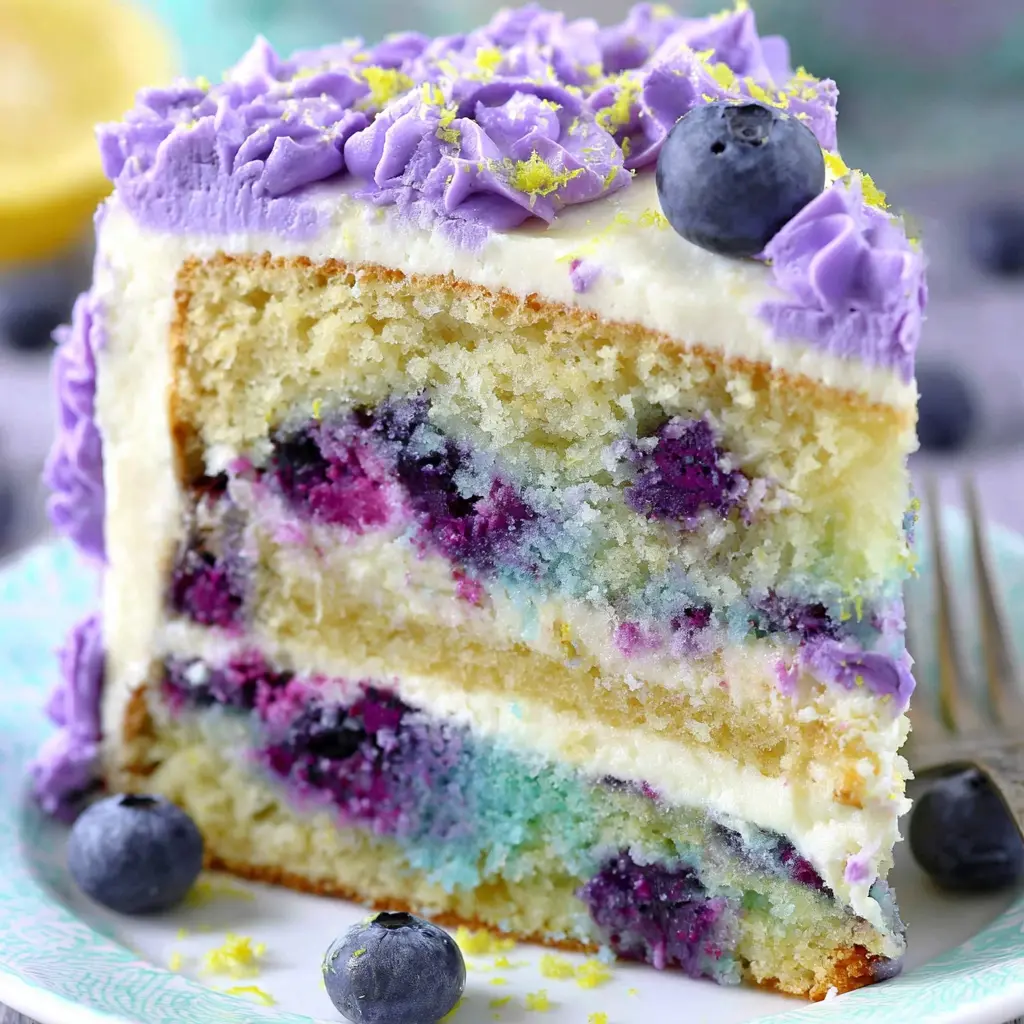
Here’s the thing. This cake looks like it belongs in a bakery case. Three distinct layers. A creamy cheesecake center studded with blueberries. Light lemon cake on top and bottom. And a tangy cream cheese frosting that ties it all together. But underneath that fancy exterior, it’s actually pretty forgiving. I mean, sure, there are a few steps. But none of them are hard. And the payoff? Ay, Dios mío, the payoff is worth every minute.
I’ll never forget the first time I attempted a layered cheesecake cake. I was trying to impress my Abuela Elena for her birthday. The cheesecake cracked like the San Andreas Fault. The cake layers slid around like they were on ice skates. And the frosting? Let’s just say it looked like a toddler decorated it. But Abuela Elena ate two slices and told me it was the thought that counted. Bless her heart. Since then, I’ve tested this recipe dozens of times. I’ve figured out the tricks. And now I’m sharing them with you.
So if you’re nervous about tackling this Lemon Berry Cheesecake Cake, don’t be. I’ve made all the mistakes so you don’t have to. Trust me on this.
The Secret to a Foolproof Cheesecake Layer
Let’s start with the part that scares most people. The cheesecake. I used to dread making cheesecake because of the cracks. You know the ones. Those ugly fissures that make your dessert look like a dried-up riverbed. But I’ve learned that with a few simple tricks, you can get a smooth, creamy cheesecake layer every time.
The first trick is the water bath. And I’m a firm believer in this. Without a water bath, you often get a browned cheesecake that sinks in the middle and has cracks. The water bath creates a gentle, even heat that surrounds the pan. It’s like giving your cheesecake a warm hug. The center cooks at the same rate as the edges, so you don’t get that dreaded dome that cracks when it cools.
Now, I know setting up a water bath sounds fussy. But it’s really not. You just wrap the bottom of your springform pan in a double layer of heavy-duty foil. Make sure there are no tears. Then place the pan in a larger roasting pan and pour hot water until it reaches halfway up the sides of the springform. That’s it. The foil keeps the water out. The steam keeps the cheesecake happy.
Another thing. Use room temperature ingredients. I cannot stress this enough. Cold cream cheese creates lumps. Cold eggs make the batter seize up. Let everything sit on the counter for at least an hour before you start. (Set a timer. You’ll forget otherwise. I always do.)
The cheesecake layer also needs to chill overnight before you assemble the cake. So plan for that. Bake it the day before, let it cool at room temperature for about an hour, then pop it in the fridge. This is non-negotiable. If you try to assemble with a warm cheesecake, you’ll end up with a mess. A delicious mess, but a mess nonetheless.
Building the Lemon Cake Layers
While the cheesecake is chilling, you can focus on the cake layers. I use a simple lemon cake recipe that’s light and fluffy but sturdy enough to hold up to the cheesecake and frosting. The key here is the lemon zest. I highly recommend using a microplane rather than a regular lemon zester because a rasp gives you much finer zest. No one wants to bite into fat hunks of peel. Trust me.
The zest goes into the sugar. You rub it together with your fingers until the sugar smells like lemon heaven. This releases the oils from the zest and infuses the entire cake with lemon flavor. It’s a little trick I learned from a pastry chef friend in Santa Monica. She says it’s the difference between a cake that tastes lemony and a cake that tastes like a lemon explosion. She’s not wrong.
When you’re mixing the batter, don’t overmix. Overmixing develops the gluten and makes the cake tough. You want a tender crumb here. Mix until the flour just disappears. A few streaks are fine. The oven will take care of them.
I bake the cake layers in 8-inch round pans. Make sure to grease and flour them well. Or use parchment paper rounds. I’m a big fan of parchment. It makes removal so much easier. Bake until a toothpick inserted in the center comes out clean or with a few moist crumbs. About 22 to 25 minutes at 350°F. Let them cool in the pans for 10 minutes, then turn them out onto a wire rack to cool completely.
And here’s a pro tip. Once the cake layers are cool, you can wrap them tightly in plastic wrap and freeze them for up to a month. Frozen layers are actually easier to work with. They’re less likely to crumble when you’re assembling the cake. Just thaw them in the fridge overnight before you use them.
The Cream Cheese Frosting That Ties It All Together
Now for the frosting. I use a classic cream cheese frosting, but with a little twist. I add extra lemon zest and a splash of vanilla. The tanginess of the cream cheese cuts through the sweetness of the cake and the richness of the cheesecake. It’s the perfect bridge between the two.
The trick to smooth cream cheese frosting is to start with room temperature butter and cream cheese. Again, let them sit out for at least an hour. Cream them together until they’re light and fluffy. Then gradually add the powdered sugar. I know it’s tempting to dump it all in at once. Don’t. You’ll end up with a cloud of sugar everywhere and lumpy frosting. Add it in batches, mixing on low speed until it’s incorporated.
If the frosting seems too thick, add a tablespoon of milk or heavy cream. If it’s too thin, add more powdered sugar. The consistency should be spreadable but not runny. You want it to hold its shape when you pipe it or spread it on the cake.
And here’s something I learned the hard way. Don’t overbeat the frosting once the sugar is added. Overbeating can cause the frosting to become too soft or even curdle. Mix until it’s just smooth. Then stop.
Assembling the Lemon Berry Cheesecake Cake
This is where it all comes together. And I’ll be honest, this part can feel a little nerve-wracking. But if you’ve done the prep work, it’s actually pretty straightforward.
Start by placing one lemon cake layer on your serving plate or cake stand. Make sure it’s completely cool. (I’ve made the mistake of frosting a warm cake. It’s not pretty.) Spread a layer of frosting on top. Not too thick. Just enough to cover the surface.
Next, gently place the chilled cheesecake layer on top of the frosting. Center it as best you can. Then spread another thin layer of frosting on top of the cheesecake. This helps the next cake layer stick.
Place the second lemon cake layer on top. Now you have a three-layer cake. Lemon cake, cheesecake, lemon cake. Beautiful.
Now for the crumb coat. This is a thin layer of frosting that seals in the crumbs. Don’t skip this step. It makes the final coat look so much cleaner. Spread a thin layer of frosting all over the cake. Don’t worry if it looks messy. That’s the point. Pop the cake in the fridge for 30 minutes to let the crumb coat set.
Once the crumb coat is firm, apply the final layer of frosting. Use an offset spatula for the smoothest results. I like to leave the top slightly rustic, with swirls and peaks. It looks more homemade that way. But you can make it perfectly smooth if that’s your style.
Finally, decorate with fresh blueberries and lemon wedges. Or you can make a quick berry compote to drizzle on top. Just simmer some blueberries with a little sugar and lemon juice until they burst and the mixture thickens. Let it cool completely before spooning it over the cake.
Common Mistakes & Fixes for Your Lemon Berry Cheesecake Cake
Mistake: The cheesecake layer cracked.
Solution: This usually happens if you overbaked it or skipped the water bath. Next time, check the cheesecake at the minimum baking time. It should still jiggle slightly in the center when you shake the pan. It will continue to set as it cools.
Mistake: The cake layers are sinking in the middle.
Solution: Your oven might be too hot, or you opened the door too early. Use an oven thermometer to check the temperature. And resist the urge to peek for the first 15 minutes of baking.
Mistake: The frosting is lumpy.
Solution: Your cream cheese or butter was too cold. Let them sit at room temperature for a full hour next time. If the frosting is already lumpy, try warming the bowl slightly over a pan of warm water and beating again.
Mistake: The layers are sliding apart.
Solution: The cheesecake wasn’t chilled long enough, or the frosting between layers was too thin. Make sure the cheesecake chills overnight. And use a generous layer of frosting between each component to act as glue.
Tips for Success with This Layered Berry Cake
I’ve made this cake more times than I can count. And every time, I learn something new. Here are the tips I wish someone had told me when I started.
Start a day ahead. The cheesecake layer needs to chill in the fridge overnight before you assemble the cake. So take that into account when you plan your baking. I usually make the cheesecake on Friday, the cake layers and frosting on Saturday morning, and assemble on Saturday afternoon. Then the cake sits in the fridge until Sunday brunch. Perfect timing.
Use a springform pan for the cheesecake. And line it with parchment paper. Here’s how I like to line the pan. Cut a strip of parchment paper that’s long enough to wrap around the inside of the pan, with a few inches of overhang. Then cut a circle for the bottom. The overhang makes it much easier to remove the cheesecake before slicing and serving. I use the same tip when making cheesecake bars and brownies.
Don’t pack the crust too hard. If you’re using a graham cracker crust for the cheesecake, press it into your lined pan just until it’s no longer crumbly. Do not pack down too hard. A tightly packed crust can become rock hard and difficult to cut through. And pre-bake the crust for 8 minutes so it has a little head start.
Slice with a sharp knife. And wipe the knife clean between each cut. This gives you those beautiful, clean slices that look so professional. I use a long, serrated knife for the best results. Run it under hot water and dry it off before each cut. The heat helps the knife glide through the layers.
Let the cake rest before slicing. After you assemble the cake, let it chill in the fridge for at least 2 hours before serving. This allows the layers to set and the flavors to meld. If you cut into it too early, the slices will be messy and the layers might separate.
Use fresh blueberries if you can. Frozen blueberries work in a pinch, but they release more moisture and can make the cheesecake layer a little wet. If you use frozen berries, don’t thaw them first. Add them directly to the batter frozen. And expect a few small cracks where the berries float to the top. They’re not noticeable once the cake is assembled.
Storage & Leftovers for Your Citrus Berry Cheesecake Dessert
This cake is best served chilled. The flavors are more vibrant, and the textures are firmer. Store any leftovers in an airtight container in the refrigerator for up to 4 days. I like to keep the cake on a cake stand with a dome cover. But if you don’t have one, you can wrap the cake loosely in plastic wrap. Just be careful not to smudge the frosting.
Can you freeze this cake? Yes, but with some caveats. The assembled cake freezes well for up to 2 months. Wrap it tightly in a few layers of plastic wrap, then a layer of foil. Thaw it in the fridge overnight before serving. The texture of the cheesecake might be slightly different after freezing, but it’s still delicious. I’ve done this for holiday parties, and no one has ever complained.
If you’re making this ahead for a party, here’s my strategy. Bake the cheesecake layer and the cake layers up to 2 days in advance. Store them separately in the fridge. Make the frosting the day before assembly. Assemble the cake the day before you serve it. This spreads out the work and reduces stress. Plus, the cake actually tastes better the next day. The flavors have time to meld and develop.
Frequently Asked Questions
Why This Recipe Works: The Science Behind the Layers
I’m a big believer in understanding why recipes work. It makes you a better baker. So let me break down the science behind this Lemon Berry Cheesecake Cake.
The water bath. Cheesecake is essentially a custard. It’s made of eggs, cream cheese, and sugar. When you bake it, the proteins in the eggs coagulate and the structure sets. But if the heat is too high or uneven, the proteins contract too quickly and the cheesecake cracks. The water bath creates a gentle, even heat that prevents this. The steam keeps the surface moist, so it doesn’t dry out and crack.
The lemon zest in sugar. Lemon zest is packed with essential oils. When you rub it into sugar, you release those oils and infuse the sugar with lemon flavor. This is more effective than just adding zest to the batter because the sugar distributes the flavor evenly throughout the cake.
The cream cheese frosting. Cream cheese has a higher fat content than butter. This makes the frosting rich and creamy. But it also means the frosting can be unstable if it gets too warm. That’s why I always chill the cake after frosting. It helps the frosting set and hold its shape.
The layering order. Lemon cake on the bottom and top. Cheesecake in the middle. This isn’t random. The lemon cake provides structure and stability. The cheesecake adds creaminess and richness. The frosting ties it all together. Each layer complements the others.
Make It Your Own: Variations and Adaptations
Once you’ve mastered the basic Lemon Berry Cheesecake Cake, feel free to experiment. Here are a few ideas to get you started.
Swap the berries. Use raspberries, strawberries, or a mix of berries instead of blueberries. Each berry brings its own flavor and color. Raspberries are more tart. Strawberries are sweeter. A mixed berry compote is gorgeous on top.
Add a lemon curd layer. Spread a thin layer of homemade lemon curd between the cake and cheesecake layers. It adds an extra punch of lemon flavor and a beautiful yellow color. Just make sure the curd is fully cooled before you use it.
Try a white chocolate ganache. Drizzle a white chocolate ganache over the top of the cake for a more decadent finish. The sweetness of the white chocolate pairs beautifully with the tart lemon and berries.
Make it a no-bake cheesecake. If you’re short on time or don’t want to turn on the oven, use a no-bake cheesecake filling instead. It’s lighter and fluffier, and it sets in the fridge without baking. Just be aware that the texture is different from a baked cheesecake.
Go dairy-free. Use dairy-free cream cheese and butter alternatives. There are some good options on the market now. The texture might be slightly different, but the flavor will still be delicious.
When You Present This Cake
When you present this Lemon Berry Cheesecake Cake to your mom on Mother’s Day, or to your friends at a spring brunch, watch their faces. The first thing they’ll see is the beautiful layers. The golden lemon cake. The creamy cheesecake studded with blueberries. The fluffy white frosting. It’s a showstopper.
And then they’ll take a bite. The tang of lemon hits first. Then the sweetness of the berries. Then the creaminess of the cheesecake. It’s a symphony of flavors and textures. Light and rich at the same time. Tangy and sweet. Every bite is different.
I’ve seen people close their eyes when they eat this cake. I’ve seen them go back for seconds. I’ve seen them ask for the recipe before they’ve even finished their first slice. That’s the power of a well-made layered cake.
So go ahead. Make this cake. You deserve the celebration. And when you do, tag me on social media. I want to see your beautiful creations. Use the hashtag #SofiasKitchen so I can find you. Bueno, pues, now get baking!
For more inspiration, check out my Pinterest boards where I share tons of variations and tips.
Source: Nutritional Information
Can I use frozen blueberries instead of fresh for this Lemon Berry Cheesecake Cake?
Yes, you can. But don’t thaw them first. Add them frozen directly to the cheesecake batter. Frozen berries tend to release more moisture, which can cause a few small cracks on the surface. They’ll still taste great.
How do I prevent the lemon cake layers from sinking in the middle?
Sinking usually means your oven temperature is too high or you opened the door too early. Use an oven thermometer to verify the temp. And don’t open the oven door for the first 15 minutes of baking. The sudden rush of cold air can cause the cake to collapse.
What is the best way to store leftover Lemon Berry Cheesecake Cake?
Store it in an airtight container in the refrigerator for up to 4 days. I like to keep it on a cake stand with a dome cover. If you don’t have one, wrap the cake loosely in plastic wrap. Let it sit at room temperature for 10 minutes before serving.
Can I make this layered berry cake ahead of time for a party?
Absolutely. I recommend making the components over two days. Bake the cheesecake and cake layers up to 2 days ahead. Assemble the cake the day before your party. The cake actually tastes better the next day when the flavors have had time to meld.
How do I get a smooth cream cheese frosting for this soft cheesecake sponge?
Start with room temperature cream cheese and butter. Cream them until light and fluffy. Add powdered sugar gradually, mixing on low speed. Don’t overbeat once the sugar is added. If the frosting is lumpy, your ingredients were too cold.
Can I use a boxed cake mix for the lemon cake layers?
You can, but I prefer making it from scratch. The texture is better, and the lemon flavor is more authentic. If you’re short on time, use a high-quality lemon cake mix and add extra lemon zest to boost the flavor. No one will know.
Why did my cheesecake layer crack even with a water bath?
A few small cracks are normal, especially with blueberries that float to the top. But large cracks usually mean the cheesecake was overbaked. Check it at the minimum baking time. It should still jiggle slightly in the center when you shake the pan.
Can I make this Lemon Berry Cheesecake Cake gluten-free?
Yes. Use a gluten-free all-purpose flour blend for the cake layers. For the crust, use gluten-free graham crackers. The cheesecake filling itself is naturally gluten-free. Just make sure all your other ingredients are certified gluten-free.