
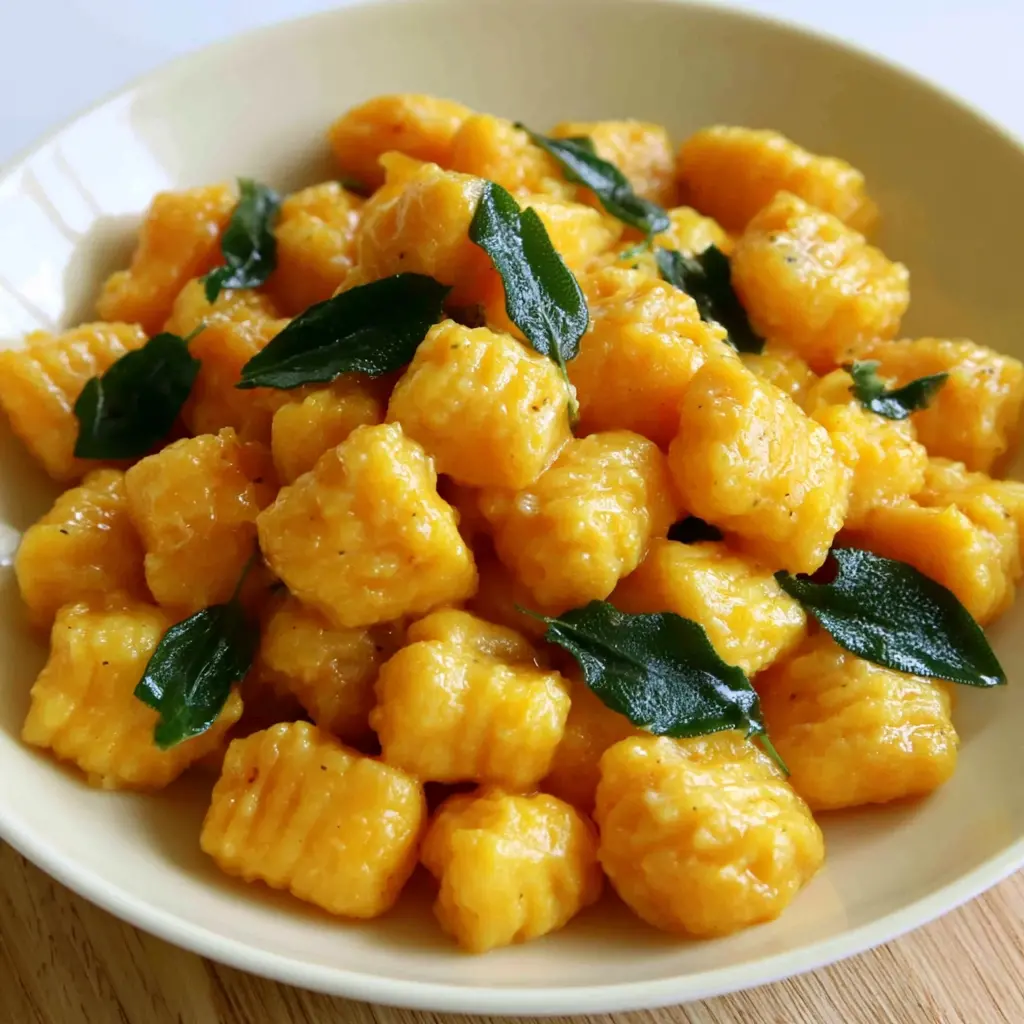
What Is Pumpkin Gnocchi?
Let’s be honest for a second. It’s August in LA, it’s 90 degrees outside, and all I want is a bowl of something cozy and autumnal. That’s the thing about cravings. They don’t really check the calendar. And pumpkin gnocchi? That’s the craving that wins.
So what exactly is pumpkin gnocchi? It’s a soft, pillowy Italian dumpling made with pumpkin, starchy potatoes, flour, and a touch of salt. Unlike traditional potato gnocchi, this version swaps in sweet, earthy pumpkin for that unmistakable fall flavor. Think of it as the love child of a classic pasta dish and your favorite pumpkin recipe.
The texture is what gets people. Good pumpkin gnocchi should be light, tender, and almost cloud-like. Not dense. Not gummy. Just delicate enough to soak up a glossy brown butter sage sauce without falling apart. When it’s done right, it’s pure magic.
Now, I’ve had my fair share of gnocchi disasters. The first time I attempted homemade gnocchi from scratch, it dissolved into a sad, murky pot of mush. I’m not exaggerating. It looked like pumpkin soup with regrets. But after a few more tries, I figured out the secrets. And I’m going to share every single one with you today.
Ingredients and Equipment
Here’s the thing about pumpkin gnocchi. You don’t need a pantry full of fancy stuff. Just a few simple ingredients, most of which you probably already have. Let’s break it down.
- Pumpkin: You’ll want about 2 2/3 cups of peeled, cubed sugar pumpkin. That’s roughly a 2 to 2 1/2 pound pumpkin. A sugar pumpkin is sweeter and less watery than the giant carving kind.
- Starchy potatoes: Russets are perfect here. They add structure and lightness. About 2/3 cup, peeled and diced.
- All-purpose flour: Just 3/4 cup, plus extra for dusting your work surface.
- Fine sea salt: A simple 1/2 teaspoon does the trick.
- Vegan butter: 2 tablespoons for that rich, nutty sauce.
- Fresh sage leaves: About 2 teaspoons, finely chopped and packed. Fresh is non-negotiable. Dried sage just won’t give you the same aromatic pop.
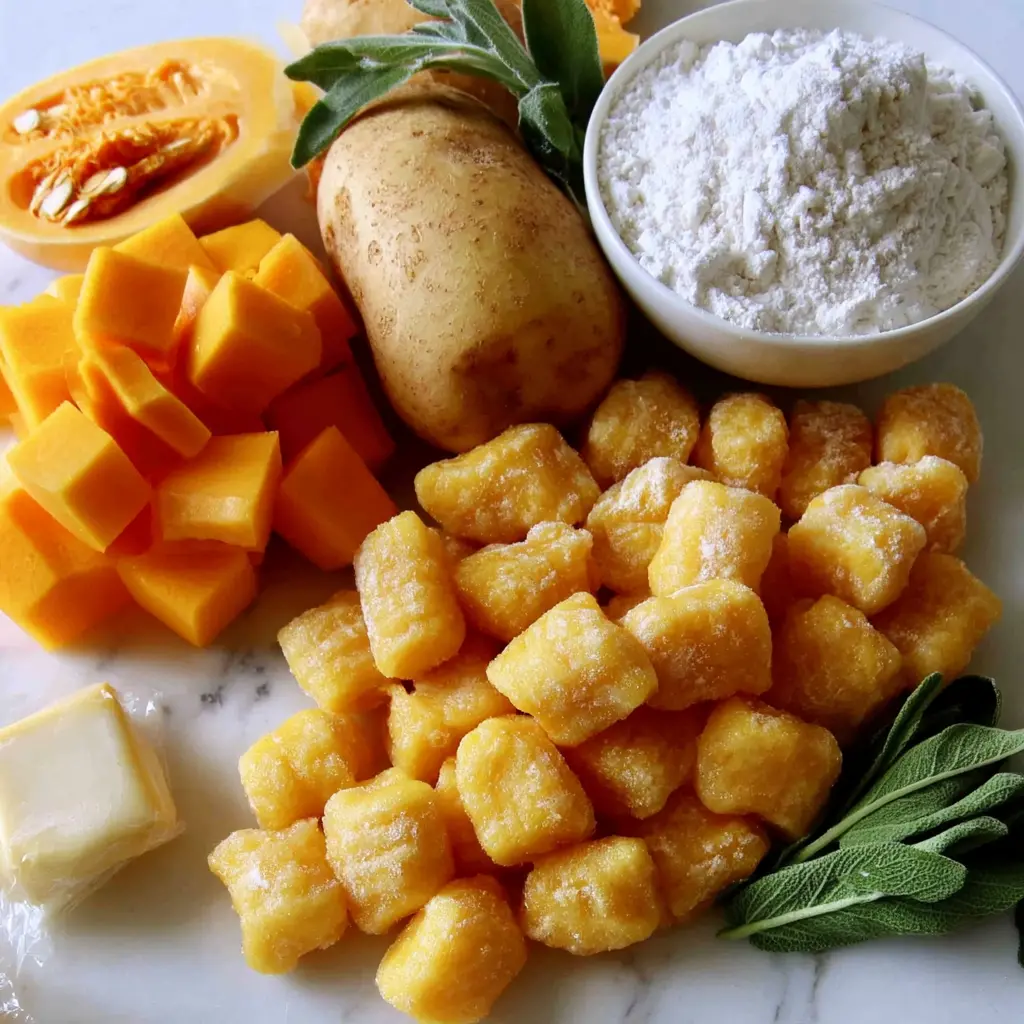
For equipment, you don’t need a professional kitchen. A large pot for boiling, a colander, a mixing bowl, and a fork or potato masher. If you have a ricer, great. If not, a fine mesh sieve and a spoon work beautifully too. A gnocchi board is nice for those classic ridges, but the back of a fork does the exact same job.
One quick note on pumpkin puree vs pumpkin pie filling. If you’re using canned pumpkin, make sure it’s 100% pure pumpkin puree. Not the sweetened pie filling. That stuff already has sugar and spices in it, which will throw off the whole dish. Fresh pumpkin is ideal for this recipe, but canned works in a pinch if you squeeze out the excess moisture.
How to Make Pumpkin Gnocchi
Okay, let’s get into the good stuff. I’m going to walk you through the whole process, stage by stage. And I promise, it’s way more forgiving than you think. The key is to move gently and trust your hands.
Stage 1: Cook Your Vegetables
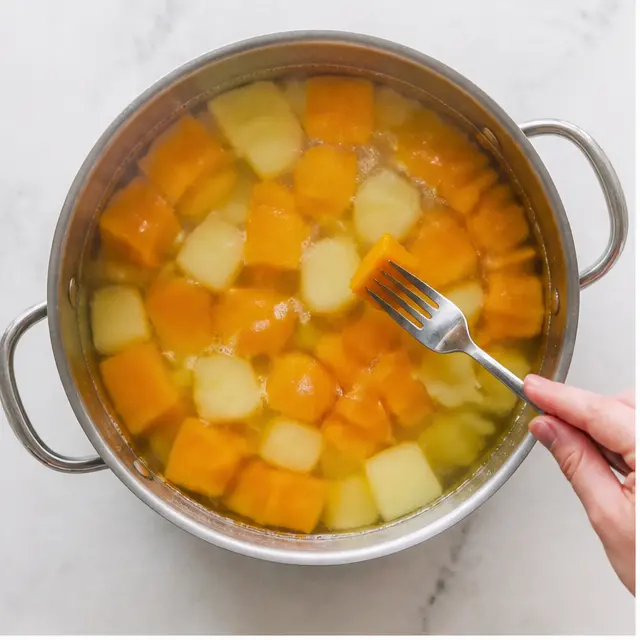
Bring a large pot of water to a rolling boil. Add the diced potatoes and pumpkin cubes together. Boil for about 15 minutes, until both are tender enough to mash easily with a fork. You want them soft, but not falling apart into the water.
Drain everything in a colander and let it cool slightly. Here’s a pro tip: let the excess moisture evaporate. Wet vegetables make for sticky dough, and sticky dough leads to tough gnocchi. Nobody wants that.
Stage 2: Mash Until Smooth
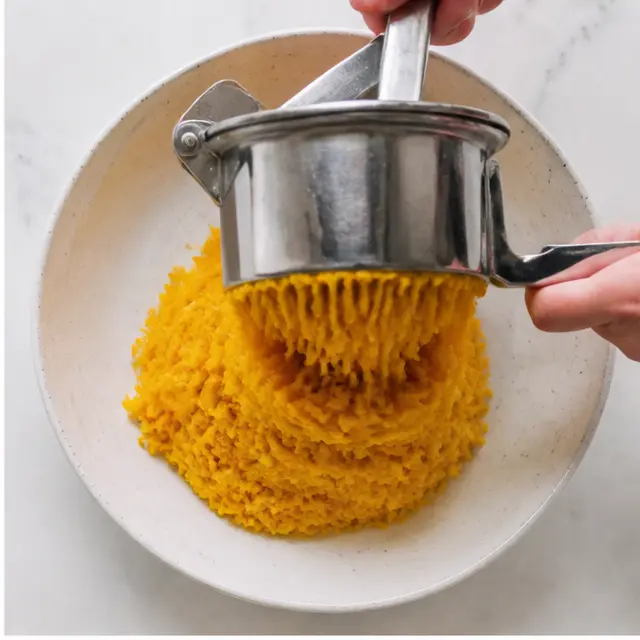
Transfer the drained vegetables to a large bowl. Mash or press them through a ricer until the mixture is completely smooth. This takes about 5 minutes. You’re looking for a fluffy, lump-free consistency. Lumps create dense spots in the dough, and we’re aiming for pillowy, not pebbly.
Mash the pumpkin when it’s warm, not hot or cold. If it’s too hot, the gnocchi won’t turn out right. If it’s too cold, you’ll overwork the dough trying to incorporate the flour. Warm is the sweet spot.
Stage 3: Form the Dough
Sprinkle the salt and flour into the mashed vegetables a little at a time. Mix gently with your hands or a wooden spoon, just until a soft dough forms. Be careful not to overwork it. Overworking develops gluten, which makes gnocchi tough and chewy. You want it tender.
The dough should feel a bit sticky but should hold together in a ball. Add the bare minimum flour to handle it. If it’s too sticky, add a tiny bit more flour. But too much flour will make the gnocchi heavy. Trust the process. This should take no more than 5 minutes.
Lightly flour a work surface and divide the dough into 4 pieces. Roll each piece into a long rope about 3/4 inch thick. Dust with extra flour as needed to prevent sticking. Then cut each rope into 3/4 inch pieces.
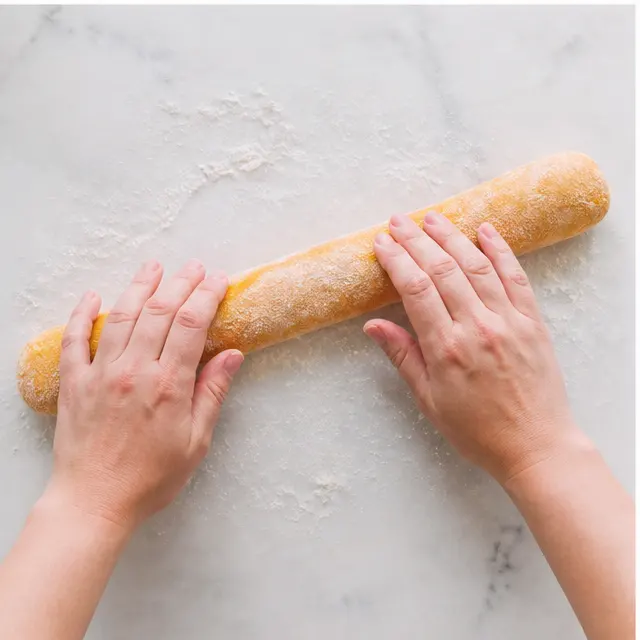
Now for the classic shape. Use a gnocchi board or the back of a fork to press ridges into each piece. Here’s a little trick I learned: aim for square cuts. When you cut the dough, it naturally drags down into a rectangle shape. That gives you the classic gnocchi look. The ridges aren’t just for show either. They help the sauce cling to every nook and cranny.
Stage 4: Cook and Toss
Bring another large pot of salted water to a gentle boil. Add the gnocchi in small batches. They’re done when they float to the surface, usually 2 to 3 minutes. This is the gnocchi float test, and it’s your best friend. The moment they bob up, they’re ready.
Remove them with a slotted spoon and let them drain briefly. Then melt the vegan butter in a wide skillet over medium heat. Stir in the sage. Add the drained gnocchi and toss gently for 2 to 3 minutes, until they’re lightly golden and well coated in the sage butter.
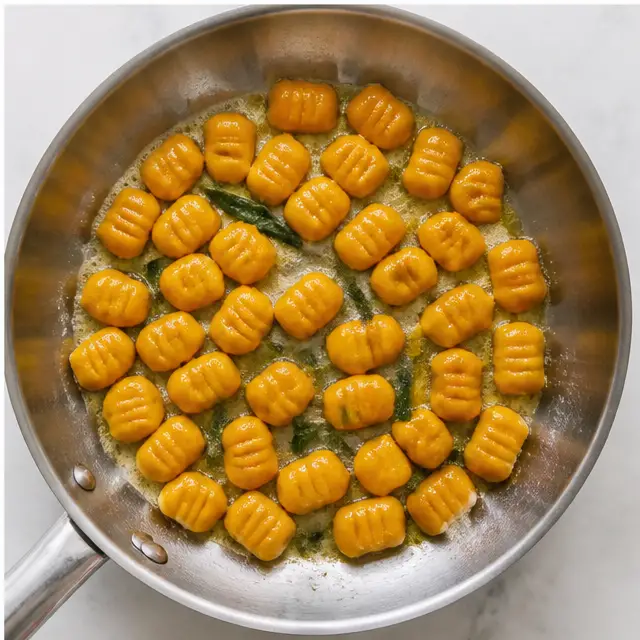
Sage Butter Sauce
Let’s talk about the real star here. The brown butter sage sauce. I know browning butter can feel intimidating. It’s one of those chef-y techniques that sounds scary. But here’s the thing: it’s actually really simple. You just have to watch it.
Melt the butter in a wide skillet over medium heat. Let it cook, swirling the pan occasionally. First, it’ll melt. Then it’ll start to foam. Keep going. The foam will subside, and the butter will turn a deep amber color. That’s when you know it’s ready. It should smell nutty and toasted, like liquid gold.
That’s the moment. The butter transforming from pale yellow to amber is the emotional climax of this whole dish. It smells incredible. Your whole kitchen will fill with that warm, nutty aroma. It’s the kind of smell that makes people wander into the kitchen asking what’s for dinner.
Stir in the finely chopped fresh sage leaves right as the butter finishes browning. They’ll crisp up slightly and infuse the butter with their earthy flavor. If you want crispy sage leaves as a garnish, you can add a few whole leaves to the pan for the last minute. They’ll turn shatteringly crisp.
This sauce is the perfect companion for pumpkin gnocchi. The nuttiness of the brown butter complements the sweetness of the pumpkin. The sage adds a savory, herbal note that cuts through the richness. It’s a classic pairing for a reason. And honestly, it’s all you need.
Short on time? Grab a bag of Trader Joe’s pumpkin gnocchi and make this brown butter sage sauce. The store-bought version works in a pinch, especially when you’re craving easy weeknight fall dinners. Just pan-sear them in the butter and sage, and suddenly they taste homemade.
Tips for Perfect Gnocchi
After many batches, I’ve learned a few things. Some through trial and error. Some through some pretty spectacular failures. Here are my best tips for light, tender, pillowy gnocchi every single time.
Common Mistakes to Avoid
❌ Overworking the dough. The more you handle it, the tougher it gets. Mix just until it comes together.
✅ Solution: Stop the moment the dough forms a soft ball. A few streaks of flour are fine.
❌ Using too much flour when the dough is sticky. It’s tempting, but it makes gnocchi heavy and dense.
✅ Solution: Just add a dusting of flour to your hands and work surface. Only add more to the dough if it’s truly unmanageable.
❌ Mashing pumpkin when it’s too hot or too cold. Temperature matters more than you’d think.
✅ Solution: Let it cool to warm before mashing and mixing in the flour.
❌ Not removing moisture from the pumpkin. Wet vegetables mean sticky dough, which means more flour, which means tough gnocchi.
✅ Solution: Let the cooked vegetables drain well in a colander. You can even pat them dry with a paper towel or press them in a clean kitchen towel.
❌ Cutting gnocchi incorrectly. If you cut straight down without any drag, you lose the classic shape.
✅ Solution: Let the dough drag down naturally as you cut. It gives you that lovely rectangle with a slightly rounded edge.
Use a ricer or fine mesh sieve for the smoothest dough. Lumps create dense spots, and we don’t want that. Fluff the mashed vegetables before adding flour. It aerates the mixture, which helps keep the gnocchi light.
Here’s another pillowy gnocchi tip: keep the dough as light as possible. Flour your hands often. Work quickly. And remember, the less you handle the dough, the more tender the final result.
Don’t overcrowd the pot when cooking. Gnocchi need room to float. If you dump them all in at once, they’ll stick together and potentially break apart. Work in small batches. Use a slotted spoon to remove them. Easy.
Pumpkin Gnocchi Variations
This recipe is a wonderful starting point, but there’s plenty of room to play. Here are some of my favorite variations and substitutions, depending on what you have in the kitchen.
- Gluten-free pumpkin gnocchi: You can substitute the all-purpose flour with a gluten-free all-purpose blend. The texture will be slightly different, but it works well. Just be gentle with the dough.
- Butternut squash gnocchi: No pumpkin on hand? Roasted butternut squash is a fantastic swap. It has a similar sweetness and creamy texture. Just make sure to extract as much moisture as possible.
- Canned pumpkin: You can use canned pumpkin puree instead of fresh. Just remember to squeeze out the excess water using paper towels in a colander. This reduces the flour needed and makes softer gnocchi.
- Potato gnocchi with pumpkin: This recipe already combines both, but you can adjust the ratio. More potato makes it lighter and fluffier. More pumpkin makes it sweeter and more flavorful.
- Vegan pumpkin gnocchi: This recipe is already vegan, using vegan butter and no eggs. But you can swap the vegan butter for regular butter if you’re not strictly plant-based. It adds a richer, nuttier flavor.
- Ricotta gnocchi recipe style: Some recipes use ricotta for extra richness. You could fold in a few tablespoons of dairy-free ricotta for a silkier texture, though that’s an optional addition.
If you want to amp up the flavor, consider adding a pinch of freshly grated nutmeg to the dough. It’s a classic pairing with pumpkin. Though the nutmeg in gnocchi is entirely optional, it adds a warm, aromatic note that feels very fall.
For serving, this dish is gorgeous on its own. But if you want to make it a full meal, try a few dessert or veggie sides. A crisp green salad with a lemon vinaigrette cuts through the richness beautifully. Some crusty sourdough bread for soaking up extra sauce is never a bad idea. Or keep it simple and let the gnocchi shine.
Storage & Reheating
Made a big batch? No problem. Pumpkin gnocchi store really well, which makes them perfect for meal prep or make-ahead dinners. Here’s what you need to know.
Refrigerating Uncooked Gnocchi
If you’re planning to cook them within a day or two, you can refrigerate the uncooked gnocchi. Place them in a single layer on a floured tray. Cover loosely with plastic wrap or a clean kitchen towel. They’ll keep for up to 2 days in the fridge. Just make sure they’re dusted with flour so they don’t stick together.
Freezing Uncooked Gnocchi
Freezing is my favorite make-ahead method. Place the shaped gnocchi on a parchment-lined baking sheet in a single layer. Make sure they’re not touching. Pop the whole tray in the freezer until they’re solid, about 1 to 2 hours. Then transfer the frozen gnocchi to a freezer bag or airtight container. They’ll keep for up to 3 months.
When you’re ready to cook them, no need to thaw. Drop them straight into boiling water. They might take an extra minute or two to float to the surface, but they’ll be perfect.
Storing Cooked Leftovers
Already cooked? Leftovers can be refrigerated for 3-4 days. Store them in an airtight container. To reheat, the best method is a skillet over medium heat with a little extra butter or olive oil. This crisps up the edges and brings back some of that fresh texture. Microwaving works in a pinch, but it tends to make the gnocchi a little mushy.
I don’t recommend freezing cooked gnocchi. It changes the texture and makes them mushy. Trust me, I’ve tried. Stick to freezing them uncooked.
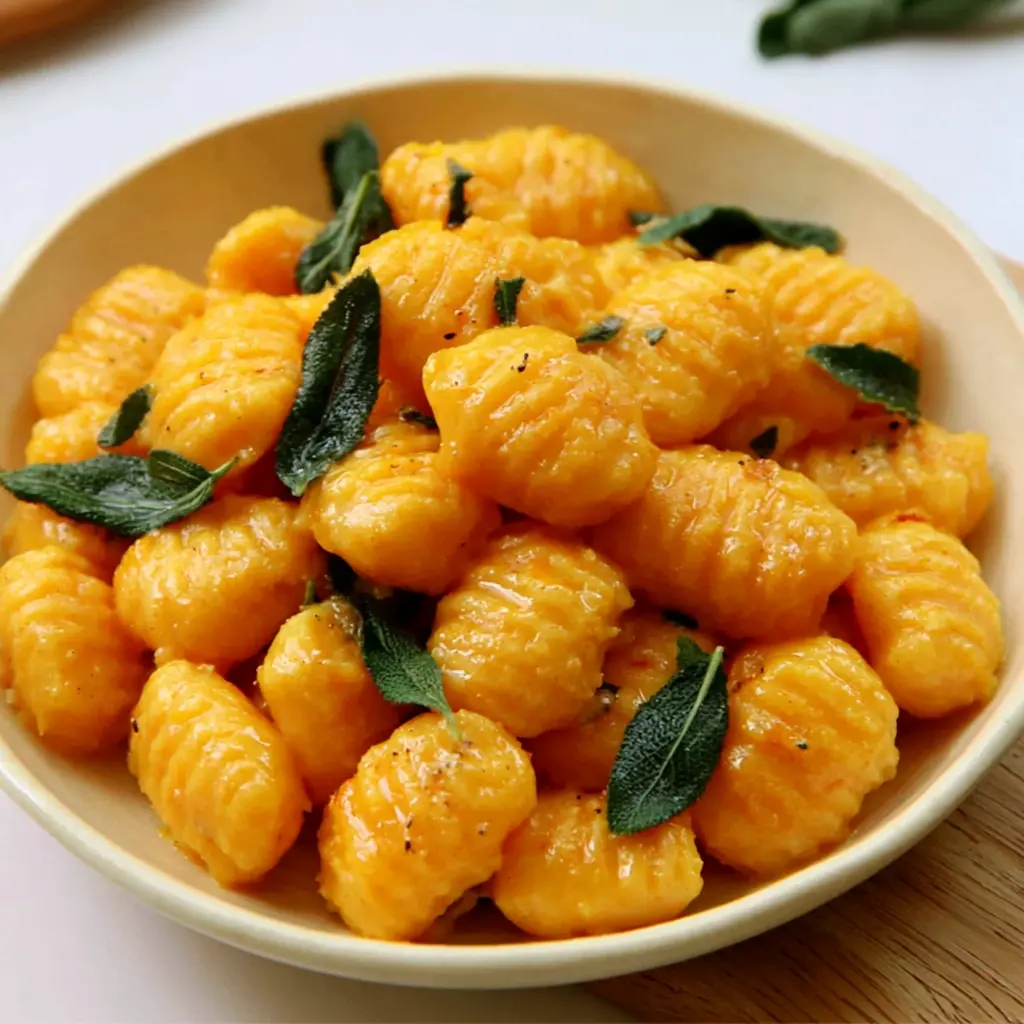
These gnocchi are best served immediately, right after they’re tossed in the sage butter. That’s when they’re at their pillowy peak. But if you have leftovers, reheating in a skillet the next day is a solid second act.
Pumpkin Gnocchi FAQ
And there you have it. A complete guide to making pillowy, restaurant-quality pumpkin gnocchi right in your own kitchen. Whether you’re craving a cozy dish in the middle of summer or planning an impressive fall dinner, this recipe has your back.
I hope you give it a try. And when you do, I’d love to hear how it goes. Tag me in your photos, drop a comment, or come say hi over on my Pinterest page. I’m always pinning new fall pasta recipes and cozy dinner ideas, and I’d love to connect with you there. Happy cooking, friends.
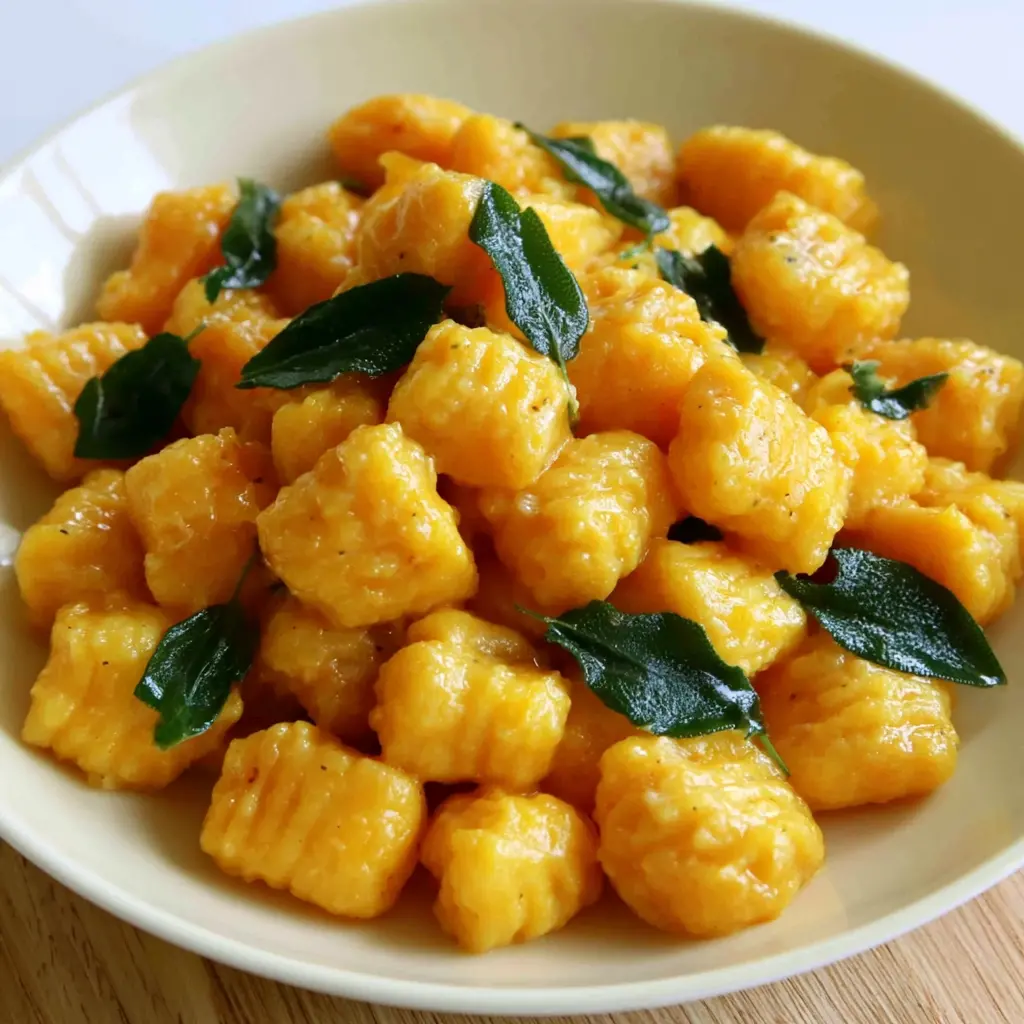
Golden Pumpkin Gnocchi with Sage Brown Butter
Ingredients
Method
- Bring a large pot of water to a rolling boil over high heat, then add the diced potatoes and pumpkin cubes. Boil for about 15 minutes, until both are tender enough to mash easily with a fork.
- Drain the vegetables in a colander and let them cool slightly while excess moisture evaporates. Transfer them to a large bowl and mash or press through a ricer until the mixture is completely smooth, about 5 minutes.
- Sprinkle the salt and flour into the mashed vegetables a little at a time, mixing gently with your hands or a wooden spoon just until a soft dough forms. Be careful not to overwork the dough so the gnocchi stay light and tender; this should take no more than 5 minutes.
- Lightly flour a work surface and divide the dough into 4 pieces. Roll each piece into a long rope about 3/4 inch thick, dusting with extra flour as needed to prevent sticking. This step takes about 5 to 10 minutes.
- Cut each rope into 3/4 inch pieces. Use a gnocchi board or the back of a fork to press ridges into each piece, then place the shaped gnocchi on a floured tray. Allow up to 10 minutes for this step.
- Bring another large pot of salted water to a gentle boil. Add the gnocchi in small batches and cook until they float to the surface, about 2 to 3 minutes. Remove them with a slotted spoon and drain briefly.
- Melt the vegan butter in a wide skillet over medium heat and stir in the sage. Add the drained gnocchi and toss gently for 2 to 3 minutes, until they are lightly golden and well coated in the sage butter.
Nutrition
Notes
Tried this recipe?
Let us know how it was!Source: Learn More About This Dish
Is gnocchi vegan?
Traditional gnocchi often contains eggs, but this particular pumpkin gnocchi recipe is completely vegan. It uses just pumpkin, starchy potatoes, flour, salt, and vegan butter. No eggs, no dairy. Just pure plant-based comfort food that everyone can enjoy.
Can I make this with homemade gnocchi instead?
Absolutely. In fact, this recipe is designed for homemade gnocchi from scratch. The combination of fresh pumpkin and starchy potatoes gives you far more flavor and a better texture than store-bought. But if you’re short on time, Trader Joe’s pumpkin gnocchi is a reliable store-bought gnocchi hack that works beautifully with the brown butter sage sauce.
What do you serve with pumpkin gnocchi?
Pumpkin gnocchi pairs beautifully with a crispy green salad dressed in lemon vinaigrette, which cuts through the richness. Crusty bread is great for soaking up extra brown butter sauce. For a heartier meal, serve alongside roasted vegetables. This dish also works well with gnocchi with parmesan sprinkled on top.
How long does it last?
Cooked pumpkin gnocchi will last 3-4 days in the refrigerator when stored in an airtight container. Uncooked gnocchi can be refrigerated for up to 2 days or frozen for up to 3 months. Freezing cooked gnocchi makes them mushy, so I recommend freezing them before cooking for the best texture.